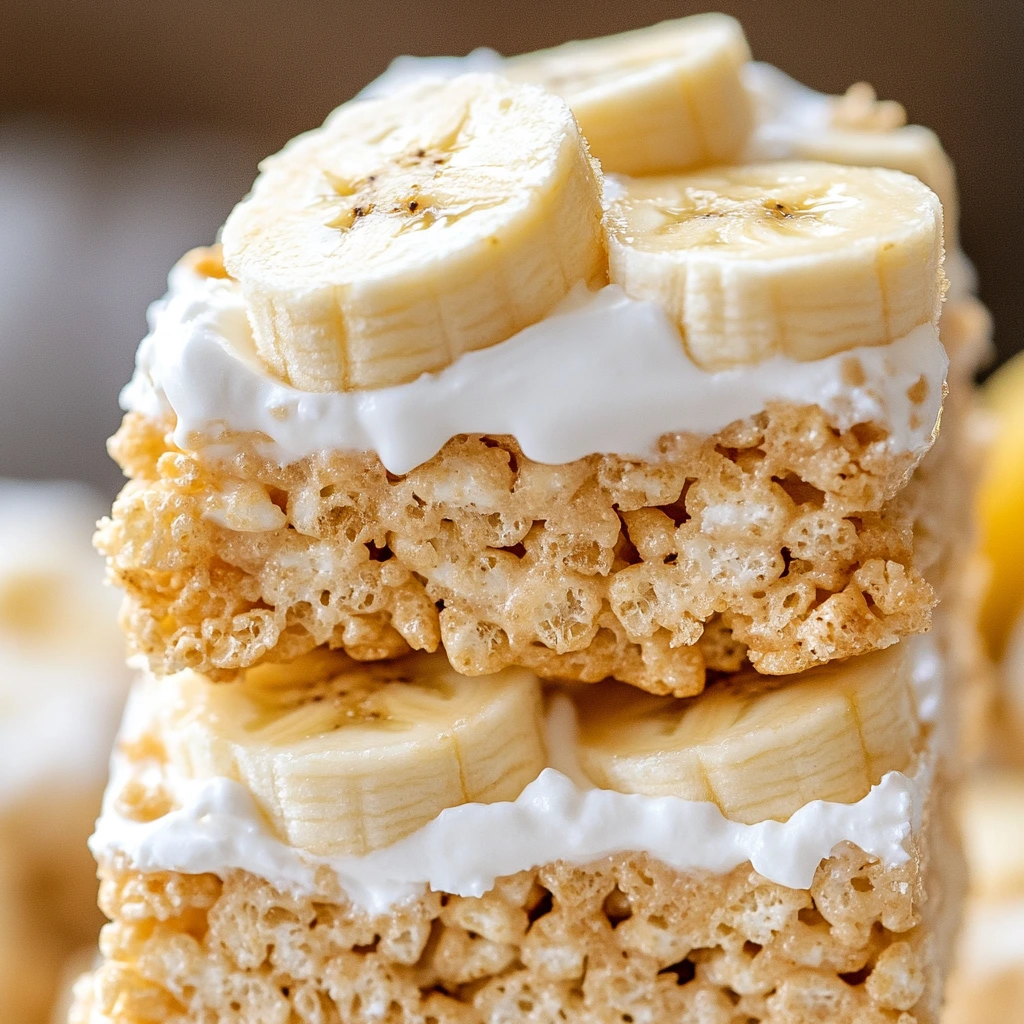
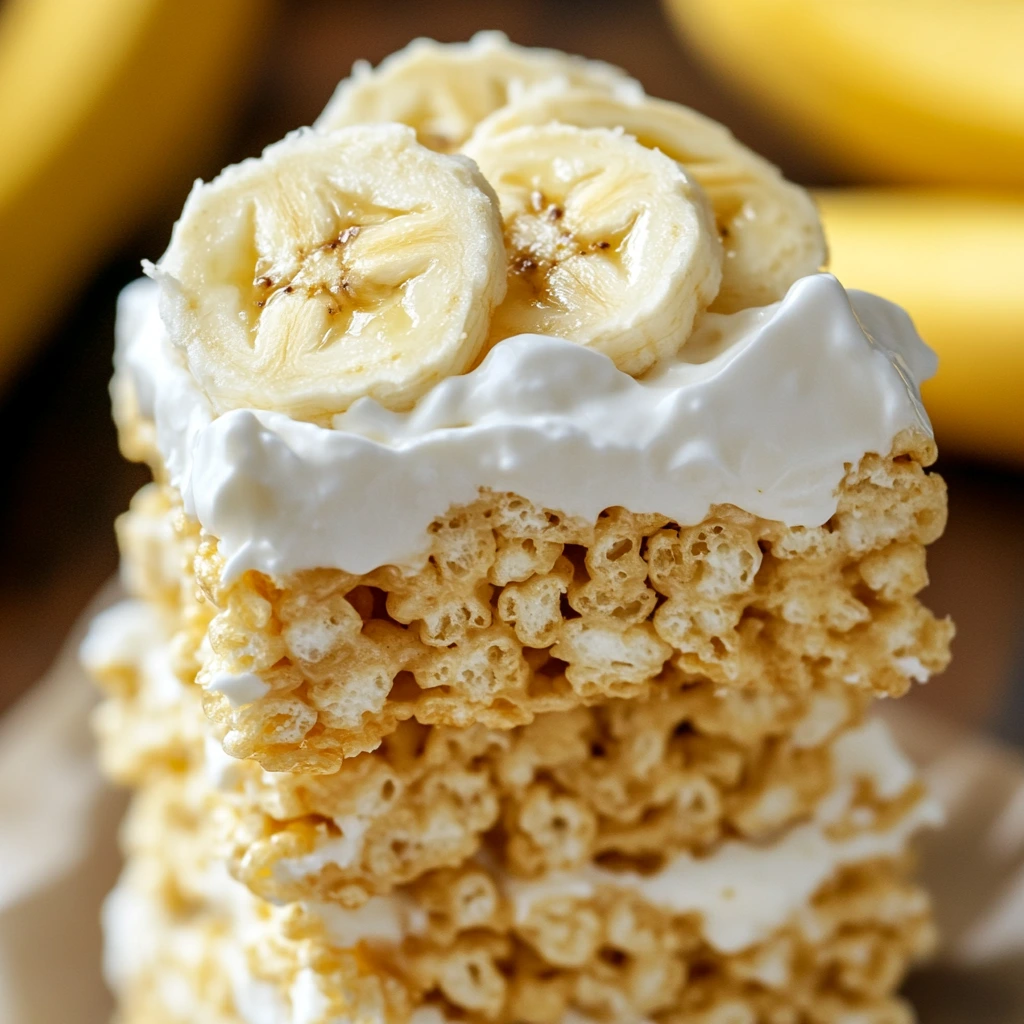
Banana Pudding Rice Krispies combine the nostalgic crunch of Rice Krispies treats with the creamy, indulgent flavors of banana pudding. This dessert brings together the perfect balance of sweetness and texture, with layers of gooey marshmallow, crispy cereal, and banana flavor that will remind you of your favorite childhood treat. The twist? It’s all about making banana pudding even more fun and approachable by turning it into a crispy, no-bake snack that’s as delicious as it is easy to prepare.
Table of Contents

Why You’ll Love Banana Pudding Rice Krispies
Banana Pudding Rice Krispies are the perfect fusion of two beloved treats, making them an irresistible snack. Here’s why you’ll fall in love with them:
- Nostalgic and comforting: The combination of creamy banana pudding and crispy Rice Krispies creates a familiar yet exciting twist on a classic.
- Simple and quick: With just a few ingredients, these treats come together in no time, making them an easy dessert for busy days or family gatherings.
- Delightfully chewy and crispy: The marshmallow mixture binds everything together for a chewy, sweet bite, while the Rice Krispies give that signature crunch.
- Perfect for any occasion: Whether it’s a birthday party, family snack, or casual dessert, these treats will surely be a crowd-pleaser.
What You’ll Need to Make Banana Pudding Rice Krispies
Before you get started, make sure you have the following ingredients and tools:
Ingredients:
- 4 cups Rice Krispies cereal
- 1 package (3.4 oz) instant banana pudding mix
- 1/4 cup melted butter
- 1 package (10 oz) mini marshmallows
- 1/2 cup milk
- 1 teaspoon vanilla extract
- Optional: sliced bananas for garnish
Equipment:
- Large mixing bowl
- 9×9-inch baking pan
- Spoon or spatula for stirring
- Microwave-safe bowl (for melting butter and marshmallows)
How to Make Banana Pudding Rice Krispies
Step 1: Melt the Butter and Marshmallows
In a microwave-safe bowl, melt the butter. Once melted, add the mini marshmallows to the bowl. Microwave in 30-second intervals, stirring in between, until the marshmallows are completely melted and smooth.
Step 2: Mix in the Pudding Mix and Milk
Once the marshmallow mixture is smooth, stir in the instant banana pudding mix, milk, and vanilla extract. This step adds that creamy, banana-flavored element to your Rice Krispies.
Step 3: Combine with Rice Krispies
In a large mixing bowl, pour the Rice Krispies cereal. Carefully pour the marshmallow and pudding mixture over the cereal. Use a spoon or spatula to gently mix everything together, ensuring the cereal is well-coated.
Step 4: Press into the Pan
Lightly grease a 9×9-inch baking pan. Transfer the mixture into the pan and press it down evenly with the back of the spoon. You want the Rice Krispies to be packed but not too tight.
Step 5: Let It Set
Allow the treats to set for about 30 minutes or until they’re firm enough to cut into squares. If you’re feeling fancy, top with a few slices of fresh banana for added flavor and garnish.
Step 6: Serve and Enjoy
Once set, slice into squares or bars and serve. These Banana Pudding Rice Krispies are perfect for snack time, dessert, or even a fun addition to a party spread.
Expert Tips for Perfect Banana Pudding Rice Krispies
- Use fresh marshmallows: Fresh marshmallows will melt more evenly and create a smoother texture.
- Don’t overmix: When combining the cereal with the marshmallow mixture, be careful not to overmix, as this can make the Rice Krispies too soggy.
- For extra banana flavor: You can also add a layer of fresh banana slices on top before serving for a more authentic banana pudding taste.
- Let them set properly: Be sure to let the treats set for at least 30 minutes before cutting into them to ensure they hold their shape.
FAQs
How long do Banana Pudding Rice Krispies last?
Banana Pudding Rice Krispies can last up to 3-4 days if stored in an airtight container at room temperature. For longer freshness, refrigerate them, but note they may become slightly softer.
Can I make these without banana pudding mix?
Yes! You can make these Rice Krispies treats with regular vanilla pudding mix for a similar flavor, or try adding a little mashed ripe banana for a natural banana flavor.
Can I freeze Banana Pudding Rice Krispies?
Yes, these treats freeze well! Wrap them tightly in plastic wrap or foil and store in a freezer-safe container for up to a month. Let them thaw at room temperature before serving.
Can I use regular Rice Krispies instead of instant pudding?
Instant pudding is key to achieving that creamy banana flavor without cooking anything. If you prefer a less sweet version, you can skip the banana pudding mix and flavor the treats with banana extract instead.
Can I use fresh bananas in the recipe?
Fresh bananas can be used as a garnish on top for extra flavor, but they will soften and brown over time. It’s best to add them right before serving.
How can I make these treats even more decadent?
For an extra indulgent touch, you can drizzle caramel or chocolate sauce over the top of the Rice Krispies before serving. You can also add chopped nuts like pecans or walnuts for a crunchy contrast.

Banana Pudding Rice Krispies
Ingredients
- 3 cups Rice Krispies cereal
- 1 box 3.4 oz instant banana pudding mix
- 4 cups mini marshmallows
- 1/4 cup butter
- 1/2 tsp vanilla extract
- 1/4 cup milk
Instructions
- In a large saucepan, melt butter over medium heat.
- Add marshmallows and stir until fully melted.
- Stir in banana pudding mix, vanilla, and milk. Mix well.
- Fold in Rice Krispies until evenly coated.
- Press the mixture into a greased 9×13-inch pan and let cool.
- Cut into squares and serve.