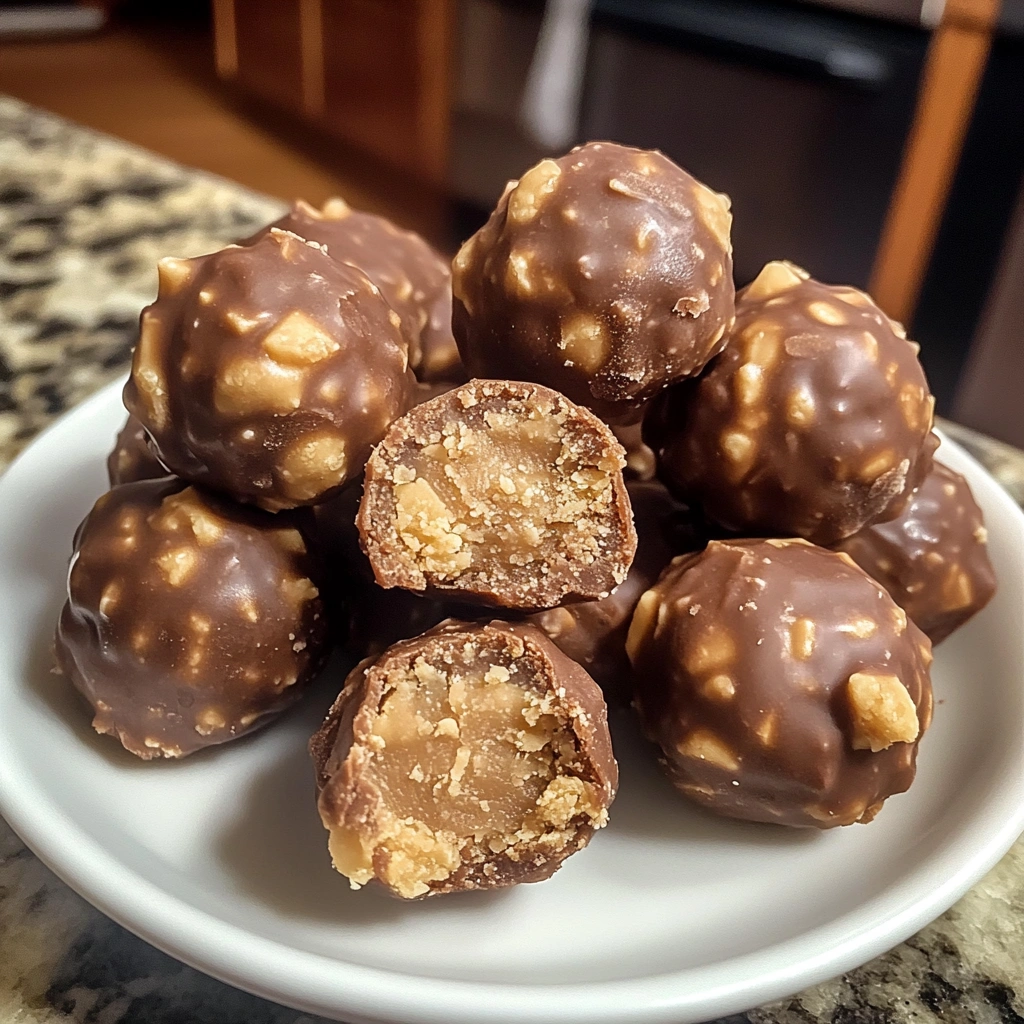
About Butterfinger Balls
Butterfinger Balls are the perfect bite-sized indulgence that combine the creamy richness of peanut butter with the crunchy, caramelized magic of crushed Butterfinger candy bars. Wrapped in a smooth chocolate coating, each ball offers an irresistible blend of texture and flavor—soft, chewy centers with that signature Butterfinger crunch and a silky chocolate finish. They’re like a bite of nostalgic joy, great for holidays, birthday parties, or anytime you’re craving a no-bake dessert that’s both easy and wildly delicious. A twist on classic peanut butter truffles, these balls are sweet, salty, and loaded with personality.


What You’ll Need for Butterfinger Balls
Complete Ingredients List
- 4 tablespoons softened butter (½ stick)
- 1 teaspoon vanilla extract
- 8 ounces chocolate bark or chocolate chips
- ½ cup Butterfinger bars, crushed
- 1 cup powdered sugar
- 1 cup peanut butter (avoid all-natural varieties)
- ¾ cup graham cracker crumbs
- Optional garnishes: additional crushed Butterfinger bars, festive sprinkles, or coarse sea salt
Ingredient Substitutions & Alternatives
Want to make these your own? Here are some delicious swaps and allergy-friendly alternatives:
- Peanut Butter: For those with peanut allergies, swap with sunflower seed butter or almond butter (note: consistency may vary slightly).
- Butterfinger Bars: Can’t find Butterfinger? Try using crushed toffee bars, peanut brittle, or even crispy rice cereal for crunch.
- Chocolate Bark or Chips: Use white chocolate or milk chocolate chips instead of dark chocolate for a different sweetness level.
- Graham Crackers: Swap with crushed vanilla wafers or digestive biscuits for a different base flavor.
- Butter: Dairy-free butter works well for vegan or lactose-sensitive eaters.
How to Make Butterfinger Balls
Step-by-step directions
- Prepare the Dough: In a mixing bowl, combine the peanut butter and softened butter. Use an electric or stand mixer on medium speed to blend until smooth and creamy.
- Add Aromatic Notes: Pour in the vanilla extract and blend thoroughly until fully incorporated.
- Sweeten the Deal: Gradually add the powdered sugar in increments, blending at low speed. Scrape down the sides of the bowl to ensure even mixing and a lump-free dough.
- Crunch Time: Gently fold in the graham cracker crumbs and crushed Butterfinger bars. Use a spatula or wooden spoon to keep the texture airy but well-blended.
- Shape ’em Up: Line a large cookie sheet with parchment paper. Scoop out about 1 to 1½ tablespoons of dough, roll into neat balls using your palms, and place evenly on the sheet.
- Chilling Phase: Place the tray in the freezer for about 30 minutes, or until the balls are firm enough to dip in chocolate without falling apart.
- Chocolate Symphony: Melt the chocolate bark or chips in a microwave-safe bowl. Heat at 50% power in 30-second intervals, stirring between each session. Stop when small lumps remain and stir to melt completely.
- Coat and Decorate: Dip each chilled ball into the melted chocolate using a fork or candy dipper. Let excess chocolate drip off. Optionally, sprinkle with crushed Butterfinger bits, festive sprinkles, or coarse sea salt while the coating is still wet.
- The Grand Finale: Place the dipped balls back on the parchment-lined tray. Let them sit at room temperature or refrigerate until the chocolate is completely set. Enjoy!
Serving Suggestions for Butterfinger Balls
How to Serve Butterfinger Balls
These delightful dessert bites are best served chilled or at room temperature. Arrange them on a serving platter or tiered dessert stand for elegant presentation. For holiday events, use colorful cupcake liners to match the theme—think red and green for Christmas or pastels for spring gatherings. For a rustic vibe, stack them inside a mason jar and tie with ribbon.
Perfect Pairings & Toppings
- Pair with: A warm cup of coffee, cold glass of milk, or a creamy vanilla milkshake.
- Garnish Ideas: Crushed Butterfinger, sprinkles, chocolate drizzle, or crushed graham cracker dust for extra flair.
- Kids’ Favorites: Try mini marshmallows or edible glitter for a whimsical touch.
Storing & Preserving Butterfinger Balls
Best Storage Methods
Store your Butterfinger Balls in an airtight container to maintain freshness. They’ll keep beautifully in the refrigerator for up to 7 days. If you’re stacking them, place parchment paper between layers to prevent sticking or damaging the chocolate coating.
Reheating or Freezing Tips
Although they don’t require reheating, Butterfinger Balls freeze wonderfully. Place them in a freezer-safe container with layers separated by parchment paper. They’ll keep for up to 3 months. When ready to enjoy, simply thaw in the refrigerator overnight or at room temperature for 20–30 minutes.
Tips for Perfect Butterfinger Balls Every Time
Avoid These Common Mistakes
- Using natural peanut butter: It often separates and results in a greasy or crumbly mixture. Stick with traditional creamy peanut butter.
- Not chilling the dough: This is a crucial step for making dipping easier and preventing balls from falling apart.
- Overheating chocolate: High heat can scorch the chocolate and change its texture. Always melt at low power and stir frequently.
Helpful Tricks for Success
- Use a cookie scoop: This ensures uniform size for even coating and a polished presentation.
- Freeze longer for humid climates: If your kitchen is warm, give the dough balls extra freezer time to stay firm during dipping.
- Decorate quickly: Add toppings immediately after dipping, before the chocolate sets.
- Use dipping tools: A fork or candy dipper makes the process cleaner and smoother.
Fun Variations of Butterfinger Balls
Flavor Variations or Recipe Twists
- Chocolate Peanut Butter Swirl: Add a tablespoon of cocoa powder to the dough for a deeper chocolate flavor.
- White Chocolate Dream: Dip the balls in white chocolate instead of dark or milk chocolate.
- Mocha Crunch: Mix in a teaspoon of instant coffee granules for a sophisticated twist.
- Cookie Dough Inspired: Add mini chocolate chips and skip the Butterfinger for a peanut butter cookie dough vibe.
Dietary-Friendly Adjustments
- Gluten-Free: Use gluten-free graham crackers and ensure chocolate chips are certified gluten-free.
- Dairy-Free: Use dairy-free butter and dairy-free chocolate chips or bark.
- Nut-Free: Try using sunflower seed butter and seed-based candy bars (or omit the Butterfinger altogether for a simpler version).
Frequently Asked Questions
What If My Butterfinger Balls Don’t Turn Out Right?
If your dough is too sticky, try adding an extra tablespoon of graham cracker crumbs or powdered sugar. If the balls are too dry and crumbly, mix in a teaspoon more of softened butter or peanut butter until the texture is right. And don’t forget the chilling phase—it makes all the difference!
Can I Prepare This in Advance?
Absolutely. You can make the dough balls up to a week in advance and keep them chilled in the fridge before dipping. You can also freeze the uncoated dough balls for later use—just thaw slightly before dipping in chocolate.
What Ingredients Can I Swap?
This recipe is super flexible. Use different nut butters, swap Butterfinger bars with any crunchy candy of your choice, or dip the balls in white chocolate for a lighter look. You can also get creative with the toppings—sprinkles, crushed cookies, or even freeze-dried fruits can make your Butterfinger Balls truly unique.
Print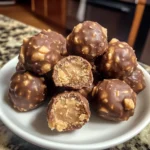
Butterfinger Balls
- Total Time: 50 minutes (including chilling)
- Yield: 24 balls 1x
- Diet: Vegetarian
Description
Butterfinger Balls are no-bake peanut butter truffles loaded with crushed Butterfinger candy, wrapped in silky melted chocolate. Sweet, salty, creamy, and crunchy all at once, they’re an easy, nostalgic dessert perfect for any occasion.
Ingredients
- 4 tablespoons softened butter (½ stick)
- 1 teaspoon vanilla extract
- 8 ounces chocolate bark or chocolate chips
- ½ cup Butterfinger bars, crushed
- 1 cup powdered sugar
- 1 cup peanut butter (avoid all-natural varieties)
- ¾ cup graham cracker crumbs
- Optional garnishes: additional crushed Butterfinger bars, festive sprinkles, or coarse sea salt
Instructions
- In a mixing bowl, combine peanut butter and softened butter. Beat with an electric or stand mixer until smooth.
- Add the vanilla extract and mix until fully incorporated.
- Gradually add powdered sugar in increments, mixing on low speed until smooth.
- Fold in graham cracker crumbs and crushed Butterfinger bars until well blended.
- Line a cookie sheet with parchment paper. Scoop 1 to 1½ tablespoons of dough, roll into balls, and place on the sheet.
- Freeze the balls for about 30 minutes until firm.
- Melt chocolate bark or chips in a microwave-safe bowl at 50% power in 30-second intervals, stirring between each.
- Dip each chilled ball into the melted chocolate, letting excess drip off. Place back on the parchment paper.
- While chocolate is still wet, optionally sprinkle with crushed Butterfinger, sprinkles, or sea salt.
- Let set at room temperature or refrigerate until chocolate is firm. Serve and enjoy.
Notes
- Use smooth, non-natural peanut butter for best texture.
- Dairy-free butter and chocolate can be used for vegan-friendly version.
- Try white or milk chocolate for a different flavor twist.
- Store in an airtight container in the fridge for up to 1 week.
- Freeze for up to 2 months for longer storage.
- Prep Time: 20 minutes
- Cook Time: 0 minutes
- Category: Dessert
- Method: No-Bake
- Cuisine: American
Nutrition
- Serving Size: 1 ball
- Calories: 145
- Sugar: 11g
- Sodium: 85mg
- Fat: 9g
- Saturated Fat: 4g
- Unsaturated Fat: 4g
- Trans Fat: 0g
- Carbohydrates: 14g
- Fiber: 1g
- Protein: 2g
- Cholesterol: 5mg
Keywords: butterfinger balls, peanut butter truffles, no bake dessert, chocolate candy balls, easy holiday treat