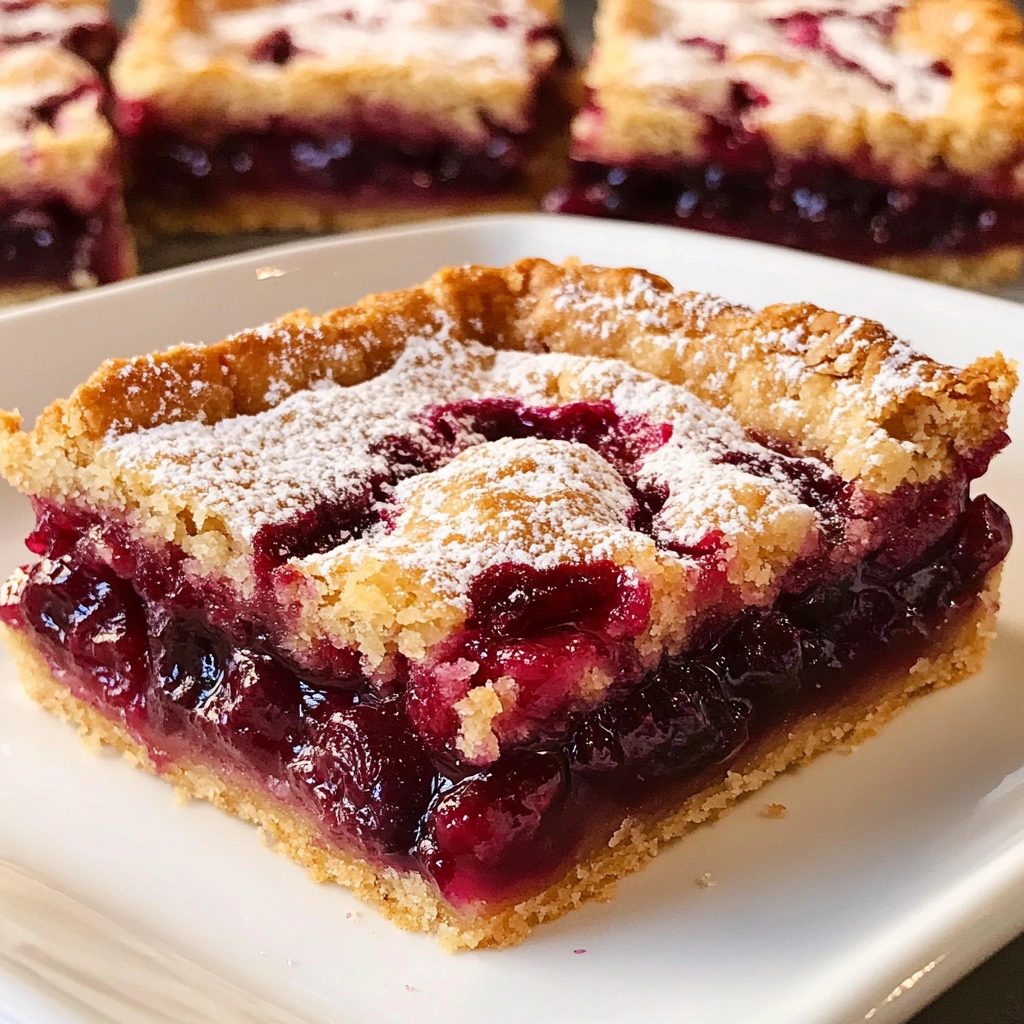
Cherry Pie Slab Bars are a delightful embodiment of summer’s juicy sweetness, encapsulated within a flaky, buttery crust that manages to hold its own against the vibrant filling. With each bite, you experience a burst of sweet-tart cherry flavor balanced perfectly with hints of lemon and vanilla, creating a symphony of curious tastes and textures. The crust adds a crisp yet tender contrast to the luscious cherry filling, making these slab bars an irresistible treat.

What You’ll Need for Cherry Pie Slab Bars
Complete Ingredients List
- 3 3/4 cups all-purpose flour, plus more for rolling
- 3/4 cup plus 1 tablespoon granulated sugar, divided
- 2 3/4 teaspoons kosher salt, divided
- 1 1/2 cups unsalted butter, cold and cubed
- 9 cups sweet dark cherries, pitted
- 6 tablespoons cornstarch
- Zest and juice of 2 lemons
- 1 teaspoon pure vanilla extract
- 1/4 teaspoon almond extract (optional)
- 7 drops Angostura bitters (optional)
- 1 large egg, beaten to blend (for egg wash)
- 3 tablespoons demerara sugar (for topping)
Ingredient Substitutions & Alternatives
If you have common allergens or dietary restrictions, you can easily modify this recipe. For a gluten-free option, substitute the all-purpose flour with a 1:1 gluten-free baking mix. If you need a dairy-free version, swapping unsalted butter with coconut oil or a vegan butter alternative is a simple fix.
For those avoiding refined sugar, consider using natural sweeteners such as maple syrup or honey, but adjust the amount of flour to maintain the dough’s consistency. To incorporate unique flavors, you can mix in other berries, such as blueberries or raspberries, or add nuts like chopped pecans or almonds for added crunch.
How to Make Cherry Pie Slab Bars
Creating Cherry Pie Slab Bars involves several steps that ensure both a delightful crust and a rich filling. Follow these detailed instructions to achieve pie perfection!
Step 1: Prepare the Dough
In a large mixing bowl, combine the flour, 1 tablespoon of sugar, and 2 1/4 teaspoons of salt. Use a whisk to mix the dry ingredients thoroughly. Take your cold, cubed butter and, using your fingertips, rub it into the flour mixture until it resembles large flat pieces, about the size of a quarter.
Next, add 3/4 cup of very cold water gradually, stirring with a fork until the mixture forms a shaggy dough. Once combined, use your hands to squeeze the mixture into a rough dough. Transfer the dough to a floured work surface and knead it gently just until it holds together. Shape it into a rectangle, wrap it tightly in plastic wrap, and refrigerate it for at least 2 hours (or up to 3 days) to chill.
Step 2: Prepare the Cherry Filling
While the dough is chilling, prepare the cherry filling. In a medium saucepan, rub lemon zest into the remaining 3/4 cup of sugar until it becomes damp and fragrant. Add the pitted cherries, cornstarch, and the remaining 1/2 teaspoon of salt, mixing until combined. Cook over medium heat, stirring occasionally, until the mixture thickens and starts to bubble, which should take about 4 to 5 minutes.
Once thickened, remove the saucepan from heat and stir in the lemon juice, vanilla extract, and any optional almond extract or bitters. Transfer the filling to a heatproof container and allow it to cool to room temperature before refrigerating until ready to use.
Step 3: Roll Out the Dough
Preheat your oven to 425°F (220°C) once your dough and filling are ready. On a lightly floured surface, take the chilled dough and roll it into roughly a 18” x 14” rectangle. Fold the rolled dough in thirds, like a letter, then portion off one-third to be reserved in the refrigerator for later use.
Next, transfer the larger piece of dough to a 13” x 9” baking pan, pressing it into the bottom, corners, and sides of the pan. Ensure there’s a slight overhang for an attractive finish on top and to hold the filling.
Step 4: Top with Cherry Filling and Bake
Roll out the reserved piece of dough into approximately a 13” x 9” rectangle. Cut out decorative shapes if desired, or simply keep it as a solid top.
Spread the cooled cherry filling evenly into the prepared baking pan over the bottom crust. Lay the top sheet of dough or decorative shapes over the filling, folding any excess dough into the overhang from the bottom crust.
Brush the dough with the beaten egg and sprinkle with demerara sugar for added texture and sweetness. Place the pan on a baking sheet to catch any drips and bake in the preheated oven for 20 minutes. After this time, reduce the oven temperature to 350°F (175°C) and continue to bake for another 60 to 90 minutes. Tent with foil if the crust begins to brown too much.
Let the cherry pie slab cool to room temperature, allowing the filling to set fully. Ideally, let it cool for at least 2 hours or overnight before slicing into generous bars.
Serving Suggestions for Cherry Pie Slab Bars
How to Serve Cherry Pie Slab Bars
Cherry Pie Slab Bars are best served at room temperature or slightly warm. For serving, cut the bars into squares or rectangles, making them easy to grab and enjoy. You could decorate the presentation by dusting the tops lightly with powdered sugar for a charming finish or serve with a scoop of vanilla ice cream on the side for a lovely contrast in temperature and flavor.
Perfect Pairings & Toppings
Thinking about what to pair with your Cherry Pie Slab Bars? A dollop of fresh whipped cream or a scoop of vanilla ice cream enhances the experience with creaminess that complements the tart filling beautifully. Consider serving them alongside a cup of coffee, tea, or even a sparkling lemonade to balance the sweetness of the dessert.
For additional flavor, you might sprinkle a touch of cinnamon or nutmeg over the top before baking, offering a warm spice that adds depth to the cherry flavor.
Storing & Preserving Cherry Pie Slab Bars
Best Storage Methods
To keep your Cherry Pie Slab Bars fresh, store them at room temperature for up to 2 days, covered lightly with plastic wrap or aluminum foil to prevent drying. If you want to keep them longer, refrigerate them for up to 5 days. Make sure to let them cool completely before refrigerating to avoid soggy bars.
Reheating or Freezing Tips
If you plan to enjoy your slab bars later, they freeze well! Place cut bars in an airtight container, separated by sheets of parchment paper to keep them from sticking together, and store them in the freezer for up to 3 months. When you’re ready to enjoy them, thaw in the refrigerator overnight and warm them gently in the oven for a few minutes to restore some of that fresh-baked texture.
Tips for Perfect Cherry Pie Slab Bars Every Time
Avoid These Common Mistakes
One common mistake is overworking the dough, which can lead to a tough crust. Ensure you handle it gently and only mix until combined. Additionally, don’t skip the refrigerating step, as chilling the dough is crucial for achieving a flaky texture.
Be mindful of the baking time—make sure to keep an eye on the crust as it can turn from golden to too dark unexpectedly. Lastly, cutting into the slab bars before they have cooled sufficiently can result in a messy presentation.
Helpful Tricks for Success
To save time, you can make the dough and cherry filling ahead of time, which gives flavors more time to develop. Quality ripe cherries make all the difference, so opt for seasonally available sweet dark cherries when possible. If fresh cherries aren’t available, frozen cherries can be a suitable alternative; just be sure to thaw and drain them well before use to avoid excess moisture in the filling.
Fun Variations of Cherry Pie Slab Bars
Flavor Variations or Recipe Twists
Experimenting with flavors can elevate your Cherry Pie Slab Bars. Consider mixing in other fruits like blueberries, raspberries, or even chopped strawberries to create a mixed berry version. For a special twist, you can add a handful of finely chopped nuts or a sprinkle of grated chocolate.
Adding spices like cardamom or allspice to the filling can introduce a warm note perfect for fall gatherings.
Dietary-Friendly Adjustments
For those on a vegan diet, try replacing the butter with a vegan alternative and using a flaxseed or chia seed egg substitute for the egg wash. To make them sugar-free, substitute granulated sugar with a suitable low-calorie sweetener.
Keto-friendly Cherry Pie Slab Bars can utilize almond flour in place of all-purpose flour while adjusting the sweeteners accordingly to fit dietary needs.
FAQs
What If My Cherry Pie Slab Bars Doesn’t Turn Out Right?
If your slab bars come out too dry, it may be due to too much flour in the dough. Ensure you measure carefully and avoid overworking the dough. If they don’t set properly, it’s likely they haven’t cooled long enough. Patience in cooling is key.
Can I Prepare This in Advance?
Absolutely! The dough can be made a few days ahead and kept refrigerated. The filling can also be prepared in advance and stored in the fridge, making assembling the slab bars a quick process when you’re ready to bake.
What Ingredients Can I Swap?
If you’re out of a specific ingredient, there are always options to switch things up. Instead of almond extract, you might try coconut extract for a tropical vibe. If you can’t find fresh cherries, certainly consider high-quality canned cherries—but be sure to drain them well.
With these tips and techniques, you’ll not only create perfect Cherry Pie Slab Bars but also enjoy the experience as much as the delicious results. So gather the ingredients, lean into the tradition, and delight your taste buds with this scrumptious dessert!
Print
Cherry Pie Slab Bars
- Total Time: 2 hours 15 minutes plus chilling time
- Yield: 15–18 bars 1x
- Diet: Vegetarian
Description
Cherry Pie Slab Bars are a deliciously rustic dessert made with a buttery homemade crust and a rich cherry filling. Perfect for serving a crowd, these bars deliver classic cherry pie flavor in an easy-to-slice format.
Ingredients
- 3 3/4 cups all-purpose flour, plus more for rolling
- 3/4 cup plus 1 tablespoon granulated sugar, divided
- 2 3/4 teaspoons kosher salt, divided
- 1 1/2 cups unsalted butter, cold and cubed
- 9 cups sweet dark cherries, pitted
- 6 tablespoons cornstarch
- Zest and juice of 2 lemons
- 1 teaspoon pure vanilla extract
- 1/4 teaspoon almond extract (optional)
- 7 drops Angostura bitters (optional)
- 1 large egg, beaten (for egg wash)
- 3 tablespoons demerara sugar (for topping)
Instructions
- Prepare the dough: In a large bowl, whisk together flour, 1 tablespoon sugar, and 2 1/4 teaspoons salt. Rub in cold, cubed butter using your fingertips until the mixture resembles large flat pieces. Add 3/4 cup of very cold water gradually, stirring until a shaggy dough forms. Shape into a rectangle, wrap, and chill for at least 2 hours.
- Make the cherry filling: In a saucepan, rub lemon zest into the remaining 3/4 cup sugar. Add cherries, cornstarch, and 1/2 teaspoon salt. Cook over medium heat for 4–5 minutes until thickened. Remove from heat and stir in lemon juice, vanilla, almond extract (if using), and bitters (if using). Cool to room temperature, then chill.
- Roll out dough: Preheat oven to 425°F (220°C). Roll out chilled dough into an 18” x 14” rectangle. Fold in thirds and divide, reserving one-third. Press the larger piece into a 13” x 9” pan with slight overhang.
- Assemble and bake: Roll the reserved dough into a 13” x 9” sheet and cut decorative shapes if desired. Spread cherry filling over bottom crust. Top with dough sheet or shapes, folding edges together. Brush with beaten egg and sprinkle with demerara sugar.
- Bake for 20 minutes, then reduce oven to 350°F (175°C) and bake for 60–90 more minutes, tenting with foil if needed. Let cool for at least 2 hours or overnight before slicing into bars.
Notes
- Use gluten-free flour for a gluten-free version.
- Substitute butter with coconut oil or vegan butter for a dairy-free option.
- Maple syrup or honey can be used in place of sugar—adjust flour accordingly.
- Mix in other berries or chopped nuts for extra flavor and texture.
- Prep Time: 45 minutes
- Cook Time: 1 hour 30 minutes
- Category: Dessert
- Method: Baking
- Cuisine: American
Nutrition
- Serving Size: 1 bar
- Calories: 320
- Sugar: 19g
- Sodium: 180mg
- Fat: 17g
- Saturated Fat: 11g
- Unsaturated Fat: 5g
- Trans Fat: 0g
- Carbohydrates: 41g
- Fiber: 2g
- Protein: 3g
- Cholesterol: 50mg
Keywords: cherry pie bars, cherry slab pie, dessert bars, fruit dessert, summer pie, crowd-pleasing dessert