About Chocolate Peanut Butter Layer Dessert
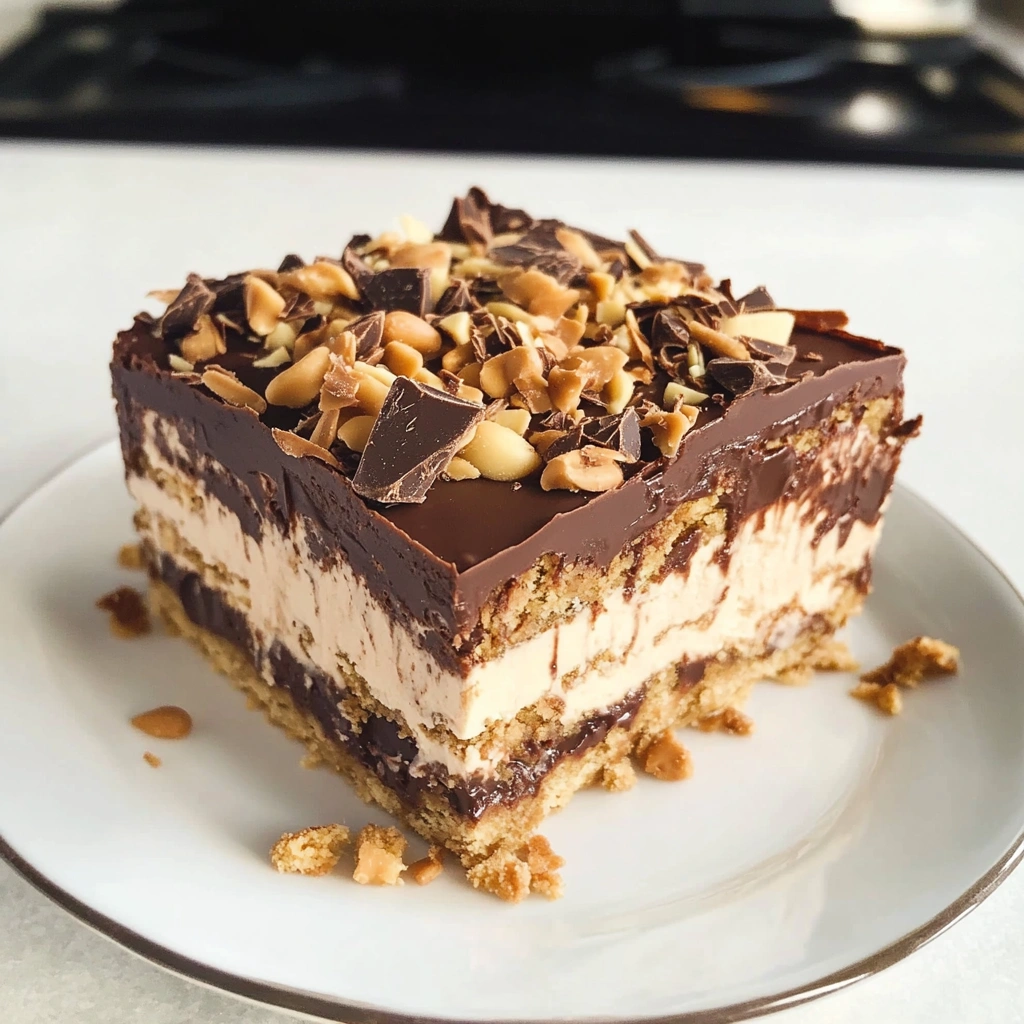
Chocolate Peanut Butter Layer Dessert is a show-stopping treat that combines the rich, nutty flavor of peanut butter with the deep, decadent taste of chocolate. This luscious dessert typically features multiple layers that create a delightful interplay of textures—creamy, crunchy, and smooth, all coming together to satisfy your sweet tooth.

What You’ll Need for Chocolate Peanut Butter Layer Dessert
Complete Ingredients List
For the Crust:
- 1 ½ cups chocolate sandwich cookies, crushed
- ½ cup unsalted butter, melted
For the Peanut Butter Layer:
- 1 cup creamy peanut butter
- 1 cup powdered sugar
- 1 ½ cups cream cheese, softened
- 1 cup whipped topping (e.g., Cool Whip)
For the Chocolate Layer:
- 1 cup semi-sweet chocolate chips
- 1 cup heavy cream
For Garnish (Optional):
- Chocolate shavings
- Chopped peanuts
- Additional whipped topping
Ingredient Substitutions & Alternatives
For Gluten-Free Option:
- Use gluten-free chocolate sandwich cookies or crushed gluten-free graham crackers for the crust.
For Dairy-Free:
- Substitute the unsalted butter with coconut oil or a dairy-free margarine, use dairy-free cream cheese, and vegan whipped topping.
Peanut Butter Alternatives:
- Sunflower seed butter or almond butter can be used if you’re allergic to peanuts.
Flavor Variations:
- For an added twist, consider incorporating crushed Oreos, adding banana slices between layers, or swirling in some caramel sauce.
How to Make Chocolate Peanut Butter Layer Dessert
Step 1: Prepare the Crust
To begin, preheat your oven to 350°F (175°C). In a mixing bowl, combine the crushed chocolate sandwich cookies with melted butter. Stir until it resembles wet sand. Press the mixture firmly into the bottom of a 9×13-inch baking dish, creating an even layer. Bake the crust in the preheated oven for about 10 minutes, then allow it to cool completely.
Step 2: Make the Peanut Butter Layer
In another bowl, mix the softened cream cheese with the creamy peanut butter and powdered sugar until smooth and creamy, ensuring there are no lumps. Once it’s well combined, gently fold in the whipped topping to add a light fluffy texture. Spread this mixture evenly over the cooled crust, smoothing out the top with a spatula.
Step 3: Prepare the Chocolate Layer
In a saucepan over medium heat, bring the heavy cream to a simmer. Add the semi-sweet chocolate chips, stirring continuously until they are fully melted and the mixture is smooth. Remove the pan from heat and let it cool for about 10-15 minutes before pouring it over the peanut butter layer, smoothing out to cover completely.
Step 4: Chill and Serve
Cover the dessert with plastic wrap or aluminum foil and refrigerate for at least four hours, or ideally overnight. This allows the layers to set properly. When you’re ready to serve, garnish the top with chocolate shavings, chopped peanuts, or additional whipped topping if desired. Cut into squares and enjoy the layers of creamy, nutty, and chocolatey goodness.
Serving Suggestions for Chocolate Peanut Butter Layer Dessert
How to Serve Chocolate Peanut Butter Layer Dessert
This dessert is best enjoyed chilled. If you’ve allowed your dessert to chill overnight, it’s perfect for serving straight from the refrigerator. For a more elegant presentation, consider plating each square on a dessert plate, drizzling with chocolate sauce or a dollop of whipped cream, and adding a sprinkle of chopped nuts for a charming touch.
Perfect Pairings & Toppings
While it can stand alone as a delightful treat, serving it alongside fresh berries or fruit can contrast the richness. A scoop of vanilla ice cream or a sprinkle of sea salt can heighten the flavors and textures, offering an exquisite dessert experience.
Storing & Preserving Chocolate Peanut Butter Layer Dessert
Best Storage Methods
To keep your Chocolate Peanut Butter Layer Dessert fresh, store it in an airtight container in the refrigerator. It will remain good for up to 5 days. If you prefer, you could also freeze it: wrap individual pieces tightly in plastic wrap and place them in a freezer-safe bag for up to one month.
Reheating or Freezing Tips
If you’ve frozen the dessert, let it defrost in the refrigerator overnight. Use caution when refreezing, as the layers’ texture may change and become less appealing. Aim to enjoy within the suggested time frame for the best taste and quality.
Tips for Perfect Chocolate Peanut Butter Layer Dessert Every Time
Avoid These Common Mistakes
To ensure success with this dessert, avoid overmixing the peanut butter layer, which can lead to a dense texture. Also, avoid skipping the cooling step before adding the chocolate layer; if added too soon, the warmth can cause the peanut butter layer to soften undesirably.
Helpful Tricks for Success
Use high-quality chocolate chips for the ganache, as they significantly influence the final flavor. Also, for quicker preparation, you can use store-bought frozen whipped topping instead of making your own, saving time without sacrificing taste. If you prefer a bit more crunch, consider adding chopped nuts or crushed chocolate cookies on top before serving.
Fun Variations of Chocolate Peanut Butter Layer Dessert
Flavor Variations or Recipe Twists
For a delightful twist, you can add a layer of banana slices between the peanut butter and chocolate layers for a banana-chocolate-peanut butter dessert. Alternatively, incorporating crushed pretzels in the crust adds a salty crunch that balances the sweetness beautifully.
Dietary-Friendly Adjustments
To cater to a keto-friendly diet, consider using almond flour mixed with cocoa powder as a crust substitute. For a vegan version, swap the dairy ingredients with plant-based alternatives as mentioned previously. You could also explore using monk fruit sweetener for a sugar-free option, keeping the dessert rich and satisfying.
FAQs
What If My Chocolate Peanut Butter Layer Dessert Doesn’t Turn Out Right?
Sometimes, the layers might not set correctly, which can occur if the crust was warm when layers were added. To troubleshoot, ensure each layer is allowed to cool completely before adding the next. If the texture ends up too dry, consider adding a drizzle of chocolate sauce on top when serving to enhance moisture.
Can I Prepare This in Advance?
Absolutely! This dessert is perfect for prepare-ahead occasions. Its flavors deepen as it chills and can be made a day or two in advance. Just be sure it’s stored well, covered tightly or in an airtight container to prevent it from absorbing odors from the fridge.
What Ingredients Can I Swap?
If you can’t find chocolate sandwich cookies or prefer not to use them, graham crackers or even vanilla wafers can work for the crust. Additionally, you can interchange various nut butters according to your dietary preferences, ensuring you enjoy the treat that suits your palate.
By following these guidelines, you can craft a mouthwatering Chocolate Peanut Butter Layer Dessert that not only pleases your taste buds but also impresses your friends and family. Enjoy the blend of creamy peanut butter and velvety chocolate, creating an unforgettable dessert experience!
Print
Chocolate Peanut Butter Layer Dessert
- Total Time: 4 hours 30 minutes
- Yield: 12 servings 1x
- Diet: Vegetarian
Description
Chocolate Peanut Butter Layer Dessert is a decadent layered treat combining a crunchy chocolate cookie crust, creamy peanut butter filling, and a smooth chocolate ganache, creating a rich and satisfying dessert experience.
Ingredients
- 1 ½ cups chocolate sandwich cookies, crushed
- ½ cup unsalted butter, melted
- 1 cup creamy peanut butter
- 1 cup powdered sugar
- 1 ½ cups cream cheese, softened
- 1 cup whipped topping (e.g., Cool Whip)
- 1 cup semi-sweet chocolate chips
- 1 cup heavy cream
- Chocolate shavings (optional)
- Chopped peanuts (optional)
- Additional whipped topping (optional)
Instructions
- Prepare the Crust: Preheat oven to 350°F (175°C). Mix crushed chocolate sandwich cookies with melted butter until crumbly. Press evenly into a 9×13 inch baking dish. Bake for 10 minutes, then cool completely.
- Make the Peanut Butter Layer: Beat softened cream cheese, peanut butter, and powdered sugar until smooth. Fold in whipped topping until light and fluffy. Spread evenly over cooled crust.
- Prepare the Chocolate Layer: Heat heavy cream in a saucepan until simmering. Remove from heat, add chocolate chips, and stir until smooth. Cool 10-15 minutes, then pour over peanut butter layer, smoothing the surface.
- Chill and Serve: Cover and refrigerate for at least 4 hours or overnight to set. Garnish with chocolate shavings, chopped peanuts, or extra whipped topping if desired. Cut into squares and serve chilled.
Notes
- Gluten-Free Option: Use gluten-free chocolate cookies or graham crackers for the crust.
- Dairy-Free Alternative: Substitute butter with coconut oil, use dairy-free cream cheese and whipped topping.
- Peanut Butter Substitutes: Sunflower seed or almond butter can be used for allergies.
- Flavor Variations: Add crushed Oreos, banana slices between layers, or swirl caramel sauce for a twist.
- Prep Time: 20 minutes
- Cook Time: 10 minutes
- Category: Dessert
- Method: Baking, Mixing, Chilling
- Cuisine: American
Nutrition
- Serving Size: 1 piece (1/12th of dessert)
- Calories: 400
- Sugar: 30g
- Sodium: 180mg
- Fat: 28g
- Saturated Fat: 12g
- Unsaturated Fat: 14g
- Trans Fat: 0g
- Carbohydrates: 32g
- Fiber: 2g
- Protein: 6g
- Cholesterol: 50mg
Keywords: chocolate peanut butter dessert, layered dessert, creamy peanut butter dessert, chocolate ganache dessert, no-bake dessert