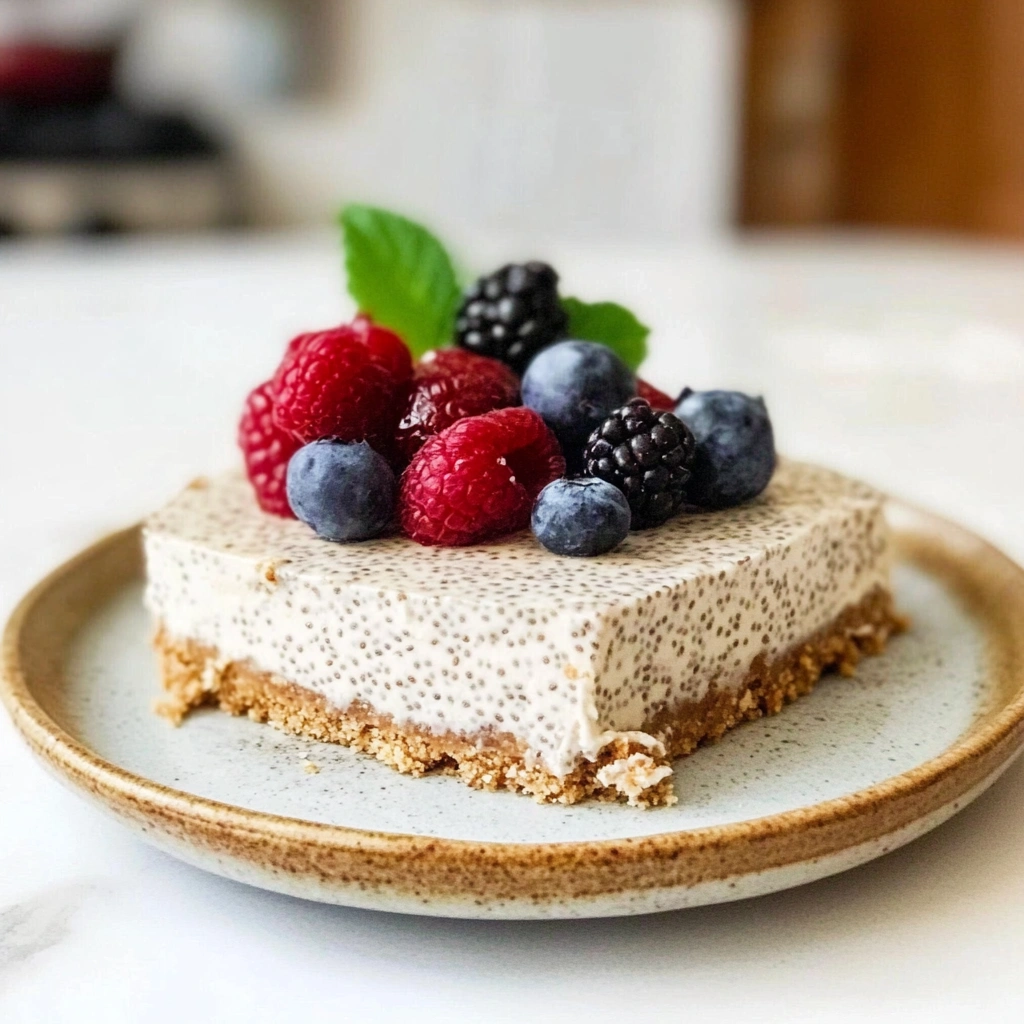
Dairy-Free Chia Cheesecake is a delightful dessert that brings together the rich, creamy texture of traditional cheesecake with the superfood goodness of chia seeds, all while being completely dairy-free. The flavor is a harmonious blend of sweetness from the agave nectar and the tanginess from the dairy-free cream cheese, complemented by a hint of vanilla. With a crunchy digestive biscuit crust and a luscious filling, this cheesecake will satisfy your sweet tooth without the heaviness of traditional dairy-filled options. Perfect for gatherings, holidays, or as a quick dessert, this no-bake recipe allows you to whip up a delicious treat without turning on the oven.

What You’ll Need for Dairy-Free Chia Cheesecake
Complete Ingredients List
- 6-7 digestive biscuits (about 1 cup of crumbs)
- 3-4 tbsp dairy-free butter or coconut oil
- 8 oz (240 grams) dairy-free cream cheese
- 2 tbsp chia seeds
- 1/4 cup water
- 1/4 cup non-dairy whipping cream
- 2-3 tbsp agave nectar (or any sweetener of your choice)
- 1 tsp vanilla extract
- 1 cup berries (for topping)
Ingredient Substitutions & Alternatives
- Digestive Biscuits: For a gluten-free option, use gluten-free digestive biscuits or graham crackers. You can also use crushed nuts or oats for a healthier, grain-free crust.
- Dairy-Free Butter: Coconut oil serves as an excellent alternative, providing a subtle coconut flavor that pairs nicely with the cheesecake.
- Dairy-Free Cream Cheese: If you’re unable to find dairy-free cream cheese, you can make a simple version by blending soaked cashews with lemon juice and a little maple syrup.
- Chia Seeds: If chia seeds aren’t available, you could use flax seeds in a similar manner for thickening.
- Non-Dairy Whipping Cream: Alternatives like coconut cream or any non-dairy whipped topping can be used here.
- Agave Nectar: Honey (if not vegan) or maple syrup are wonderful substitutes.
- Berries: Feel free to mix it up with other fruits like mangoes, peaches, or even chocolate shavings for a different flavor profile.
How to Make Dairy-Free Chia Cheesecake
This simple recipe for Dairy-Free Chia Cheesecake consists of a few straightforward steps that anyone can follow, even beginners.
Step 1: Prepare the Crust
To begin, pulse the digestive biscuits in a food processor until you achieve fine crumbs. This process usually takes about 15 seconds.
Once you have your crumbs, combine them with the melted dairy-free butter or coconut oil in a mixing bowl until it resembles wet sand. This mixture will form your crust.
Next, line the walls of a 6-inch cake pan with a piece of parchment paper or an acetate sheet to avoid sticking. Press the crumb mixture firmly into the bottom of the pan, making sure it is evenly distributed. Chill in the refrigerator for 30 minutes, or if you have the time, let it set for up to 6 hours for an even better texture.
Step 2: Prepare the Chia Mixture
While your crust is chilling, let’s prepare the chia seed mixture. In a small bowl, combine the chia seeds with the 1/4 cup of water and set them aside. This combination will allow the chia seeds to activate and form a gel-like consistency, which will help thicken your cheesecake filling.
Step 3: Make the Cream Cheese Filling
Bring the dairy-free cream cheese to room temperature before using; this will ensure smooth mixing. Using an electric mixer, beat together the softened cream cheese and agave nectar in a large mixing bowl for about 2 minutes until creamy.
Take a spatula and scrape down the sides and bottom of the bowl to make sure all ingredients are fully combined. Next, add in the vanilla extract and start pouring in the non-dairy whipping cream gradually while mixing on a low-speed setting. After about 2 minutes of mixing on high speed, the mixture should become light and fluffy.
Step 4: Incorporate the Chia Seeds
Then, add the prepared chia seed mixture to the filling. Gently fold or mix it in until thoroughly combined.
Once your cheesecake filling is ready, pour it over the chilled crust in the cake pan. Using the back of a spoon or a spatula, smooth the top out so it looks appealing.
Finally, cover the cheesecake with plastic wrap and refrigerate for at least 6 hours or, if you can resist the temptation, leave it overnight to set beautifully.
Serving Suggestions for Dairy-Free Chia Cheesecake
How to Serve Dairy-Free Chia Cheesecake
When serving your Dairy-Free Chia Cheesecake, it is best enjoyed chilled. To present it beautifully, carefully remove it from the cake pan once it is fully set. You can use a warm knife to make clean cuts when slicing.
Use a spatula to transfer individual slices onto plates. This dessert is not only delicious but looks beautiful due to the creamy filling and the topping of fresh berries.
Perfect Pairings & Toppings
When it comes to toppings, feel free to get creative! The cheesecake is delicious topped with fresh berries such as strawberries, blueberries, or raspberries. You can also sprinkle some crushed nuts for added crunch or drizzle a bit more agave or maple syrup on top for sweetness.
For an extra indulgent experience, you can serve it alongside a scoop of dairy-free ice cream or a dollop of coconut whipped cream.
Storing & Preserving Dairy-Free Chia Cheesecake
Best Storage Methods
To store your Dairy-Free Chia Cheesecake, make sure it is completely cool and set. You can either keep it covered in the fridge in an airtight container or leave it in the cake pan covered with plastic wrap. It is best consumed within 5-7 days.
If you want to prolong its shelf life, consider freezing. Wrap individual slices in plastic wrap, then place them in an airtight freezer bag. You can store the cheesecake this way for up to 2 months.
Reheating or Freezing Tips
Reheating is not necessary or recommended for cheesecake, as it is served chilled. If you have frozen slices, simply transfer them from the freezer to the refrigerator and let them defrost overnight for the best texture.
Tips for Perfect Dairy-Free Chia Cheesecake Every Time
Avoid These Common Mistakes
- Incorrect measurements: Always use accurate measurements when preparing your ingredients, as even a slight difference can affect your cheesecake’s texture and flavor.
- Not letting the cheesecake set: Be patient and allow the cheesecake to fully chill in the refrigerator for the specified time. Cutting it too soon may lead to a runny filling.
- Overmixing the filling: Overmixing can incorporate too much air, leading to a different texture. Mix until just combined.
Helpful Tricks for Success
- To save time, you can easily make the crust ahead of time and refrigerate it until you are ready to make the filling.
- Keep all of your ingredients at room temperature before starting to mix. It will help achieve a smooth filling without lumps.
- For an extra creamy texture, blend the filling in a blender rather than using a mixer, as this can help remove any lumps more efficiently.
Fun Variations of Dairy-Free Chia Cheesecake
Flavor Variations or Recipe Twists
You can customize your Dairy-Free Chia Cheesecake by adding flavors like lemon zest, matcha powder, or cocoa powder to the filling. These additions can transform the flavor profile, providing delightful variations.
You can also add in chopped nuts, chocolate chips, or pureed fruits for an exciting twist. Just ensure not to add too much liquid to maintain the filling’s consistency.
Dietary-Friendly Adjustments
For a vegan version, simply ensure all your ingredients are plant-based, including the dairy-free cream cheese and whipping cream.
You can easily make it sugar-free by using stevia or monk fruit sweetener if you’re looking to cut down on sugar.
For low-carb versions, consider a nut-based crust and omit the sweeteners or use low-carb alternatives.
FAQs
What If My Dairy-Free Chia Cheesecake Doesn’t Turn Out Right?
If your cheesecake is too dry, it may have been overmixed or stored for too long. To add moisture, consider serving the cheesecake with a sauce, such as a fruit puree. If it’s too wet, chilling it longer in the fridge can help set it up.
Can I Prepare This in Advance?
Absolutely! This cheesecake can be prepared a day in advance. Simply store it covered in the fridge, and it will develop even more flavor as it sets overnight.
What Ingredients Can I Swap?
If you can’t find dairy-free cream cheese, consider blending soaked cashews with a little lemon juice and sweetener. For sweeteners, almost any natural alternative can work, just adjust the quantity to taste, as they can vary significantly in sweetness.
Print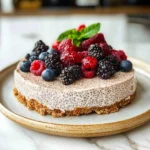
Dairy-Free Chia Cheesecake
- Total Time: 4 hours 20 minutes (including chilling time)
- Yield: 6 servings 1x
- Diet: Vegan
Description
Dairy-Free Chia Cheesecake is a creamy, no-bake dessert that combines the tang of dairy-free cream cheese with the superfood benefits of chia seeds. With a crunchy digestive biscuit crust and sweet agave vanilla flavor, it’s a healthier, lighter alternative to traditional cheesecake.
Ingredients
- 6–7 digestive biscuits (about 1 cup of crumbs)
- 3–4 tbsp dairy-free butter or coconut oil
- 8 oz (240 grams) dairy-free cream cheese
- 2 tbsp chia seeds
- 1/4 cup water
- 1/4 cup non-dairy whipping cream
- 2–3 tbsp agave nectar (or any sweetener of your choice)
- 1 tsp vanilla extract
- 1 cup berries (for topping)
Instructions
- Pulse digestive biscuits in a food processor until they become fine crumbs.
- Mix the crumbs with melted dairy-free butter or coconut oil until it resembles wet sand.
- Line a 6-inch cake pan with parchment or acetate, and press the crumb mixture into the base evenly. Chill for 30 minutes or up to 6 hours.
- In a small bowl, mix chia seeds with 1/4 cup water and let sit until gel-like, about 10-15 minutes.
- In a large bowl, beat softened dairy-free cream cheese with agave nectar until creamy (about 2 minutes).
- Add vanilla extract and slowly mix in the non-dairy whipping cream. Beat for another 2 minutes until light and fluffy.
- Fold the chia seed gel into the cream cheese mixture until fully combined.
- Pour the filling over the chilled crust and smooth the top. Chill the cheesecake for at least 4 hours or until set.
- Before serving, top with fresh berries.
☀️ Best Summer Kitchen Deals


Notes
- Use gluten-free biscuits for a gluten-free version.
- Coconut cream can be substituted for non-dairy whipping cream.
- For a stronger vanilla flavor, add a touch of vanilla bean paste.
- Let the cheesecake chill overnight for best texture.
- Prep Time: 20 minutes
- Cook Time: 0 minutes
- Category: Dessert
- Method: No-Bake
- Cuisine: American
Nutrition
- Serving Size: 1 slice
- Calories: 210
- Sugar: 8g
- Sodium: 90mg
- Fat: 14g
- Saturated Fat: 6g
- Unsaturated Fat: 7g
- Trans Fat: 0g
- Carbohydrates: 18g
- Fiber: 3g
- Protein: 3g
- Cholesterol: 0mg
Keywords: Dairy-Free Cheesecake, No-Bake Vegan Cheesecake, Chia Seed Dessert, Vegan Cheesecake Recipe, Healthy Cheesecake Alternative