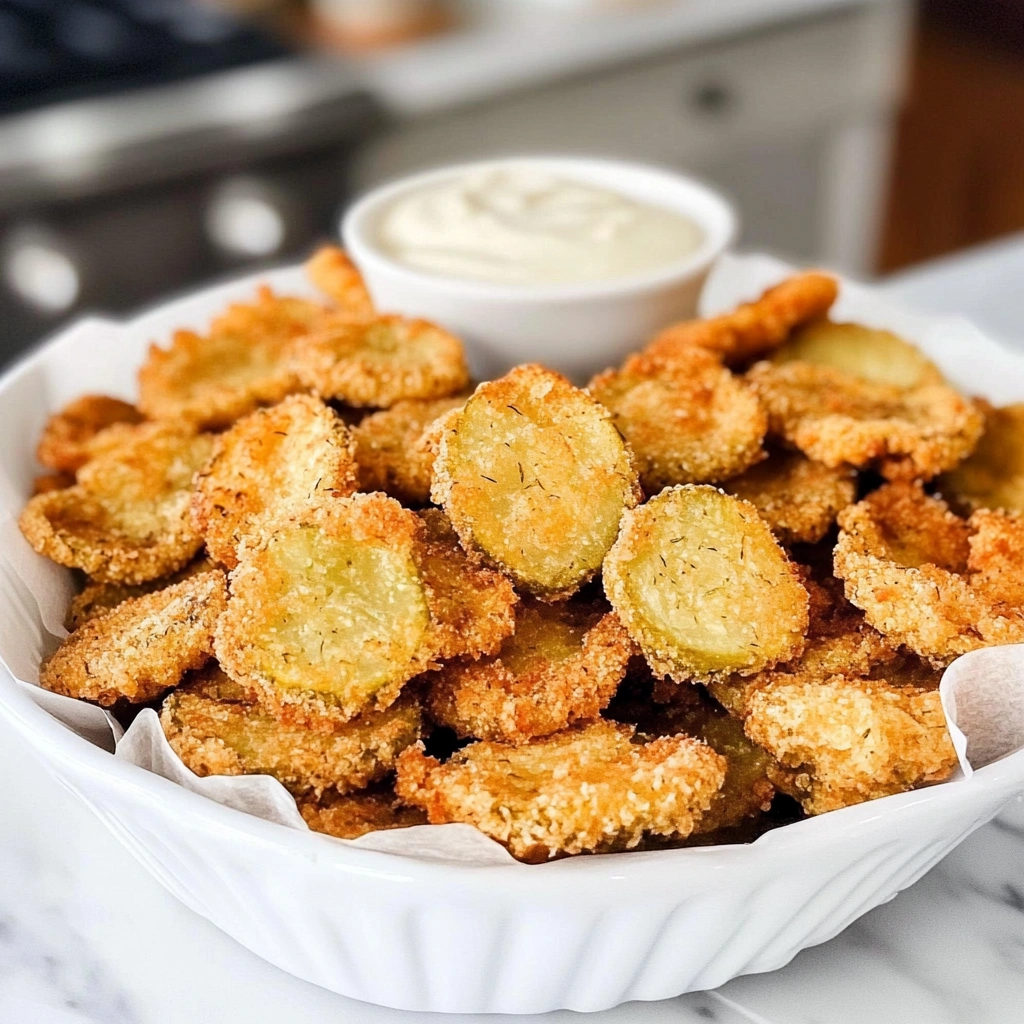
Fried dill pickles have become a beloved snack and appetizer in various culinary scenes across the United States. With their origins rooted in Southern cuisine, they bring together the tangy flavor of dill pickles and a crispy, golden coating that makes them utterly irresistible. The juxtaposition of the tartness from the pickles and the crunchy texture from the fried batter creates a snack that is not only flavorful but also visually appealing.

What You’ll Need for Fried Dill Pickles
Complete Ingredients List
- Vegetable oil (for frying)
- 1 (16-ounce) jar dill pickle slices
- 1/2 cup all-purpose flour
- 2 teaspoons garlic salt
- 1 teaspoon Italian seasoning
- 1/4 teaspoon pepper
- 3/4 cup water
- 1 1/2 cups panko breadcrumbs
Ingredient Substitutions & Alternatives
- Gluten-Free Option: Substitute all-purpose flour with almond flour and use gluten-free breadcrumbs.
- Dairy-Free Alternative: This recipe is already dairy-free; you can maintain that by using plant-based ingredients.
- Flavor Variations: Consider adding spices like cayenne pepper for heat or a dash of paprika for smokiness.

How to Make Fried Dill Pickles
Step 1: Prepare the Oil
Begin by filling a frying pan with about 1/2 inch of vegetable oil. Heat it over medium-high heat until the temperature reaches between 350°F to 375°F. This range is critical as it ensures a perfectly crispy exterior without overcooking the interior. A deep-fry thermometer can be incredibly helpful for maintaining the right temperature.
Step 2: Prepare the Pickles
While the oil heats, take your dill pickle slices out of the jar and drain them thoroughly. Lay the sliced pickles on a plate lined with paper towels. This step is crucial as it removes excess moisture, which can cause the batter to slide off during frying. Pat the pickles lightly with additional paper towels to ensure they’re adequately dried.
Step 3: Make the Batter
In a shallow bowl, whisk together the all-purpose flour, garlic salt, Italian seasoning, and pepper. Add the water gradually, mixing until the batter is smooth and free of lumps. The consistency should be thick enough to coat the pickles but thin enough to allow for easy dipping.
Step 4: Prepare the Breadcrumbs
In a separate shallow dish, place the panko breadcrumbs. These breadcrumbs will provide an extra-crunchy texture compared to regular breadcrumbs, making your fried dill pickles even more delightful.
Step 5: Dip and Coat the Pickles
Working in small batches, take a few pickle slices and coat them in the batter, ensuring each side is fully covered. Then, transfer them to the dish of panko breadcrumbs, pressing lightly to ensure an even coating. This two-step process of battering and breading will result in a delicious crunch that’s characteristic of fried pickles.
Step 6: Fry the Pickles
Once your oil is at the right temperature, carefully add the coated pickles to the hot oil, being careful not to overcrowd the pan. Fry them in batches for about 1 to 2 minutes on each side or until they achieve a golden brown color. Use a slotted spoon to gently flip the pickles halfway through cooking to ensure they fry evenly.
Step 7: Drain and Serve
After frying, remove the pickles with the slotted spoon and place them on a plate lined with paper towels. This will help absorb any excess oil, keeping the fried pickles crispy rather than greasy. Repeat the frying process with the remaining batches.
Step 8: Enjoy!
Serve your fried dill pickles immediately while they are warm and crispy. Pair them with ranch dressing, marinara sauce, or even a zesty garlic aioli for dipping. Enjoy the delightful crunch and the tangy flavor that makes these pickles a hit!
Serving Suggestions for Fried Dill Pickles
How to Serve Fried Dill Pickles
Fried dill pickles are best served warm. When plated, they can be arranged in a neat pile or in a beautiful circle around a dipping sauce to create an appealing presentation. For an extra touch, consider garnishing the plate with fresh herbs like parsley or dill, lending a splash of green that enhances the visual appeal of the dish.
Perfect Pairings & Toppings
When it comes to accompaniments, ranch dressing is traditionally favored for its creamy, herby flavor that complements the pickles beautifully. Marinara sauce also makes for a fantastic dip, adding a rich tomato flavor with a hint of sweetness. If you’re feeling adventurous, try serving with a spicy sriracha mayo or a homemade garlic aioli for additional zest.
For a more substantial serving, consider pairing fried dill pickles with other appetizers like buffalo wings, potato skins, or cheese curds for an ultimate snack platter perfect for gatherings or game day parties.
Storing & Preserving Fried Dill Pickles
Best Storage Methods
To maintain the best quality, fried dill pickles should be stored in an airtight container in the refrigerator. They can typically last for about 2 to 3 days when stored properly. However, for the most satisfying texture, it is recommended to consume them fresh as the breading may lose its crunch over time.
Reheating or Freezing Tips
If you enjoy leftovers, the best reheating method is to place the fried pickles in a preheated oven at 350°F for about 10-15 minutes, until they are heated through and crispy again. Avoid using a microwave, as this method will result in soggy pickles.
While freezing fried dill pickles is not the most recommended method due to potential loss of texture, if you choose to do so, let them cool completely and place them in a freezer-safe container. They may last for up to 1 month in the freezer. When you’re ready to eat them, it’s best to reheat them straight from the freezer in the oven, as this will help maintain as much crunch as possible.
Tips for Perfect Fried Dill Pickles Every Time
Avoid These Common Mistakes
- Overcrowding the Pan: Frying too many pickles at once can lower the oil’s temperature, leading to greasy pickles. Always fry in small batches for optimal results.
- Not Draining the Pickles: Skipping the draining step can result in excess moisture during frying, causing the batter to slide off.
- Incorrect Oil Temperature: Not monitoring the oil temperature may lead to soggy pickles if the oil is too cold or burnt pickles if too hot.
Helpful Tricks for Success
- Use a Thermometer: An accurate thermometer is your best friend for frying. It ensures your oil is at the perfect temperature for frying, resulting in crunchy and delicious pickles.
- Double-Dip for Extra Crunch: For an even crunchier coating, consider double-dipping the pickles. After the first batter and breadcrumb coating, dip them in the batter again and coat with the breadcrumbs once more before frying.
- Experiment with Seasoning: Don’t hesitate to add your favorite herbs and spices to the batter for an extra flavor boost. Consider smoked paprika or Cajun seasoning for a different twist.
Fun Variations of Fried Dill Pickles
Flavor Variations or Recipe Twists
- Spicy Fried Dill Pickles: Add cayenne pepper or chili powder to the batter for a spicy kick that balances the tangy pickles perfectly.
- Cheesy Fried Dill Pickles: Fold finely grated cheese into the panko breadcrumbs before coating the pickles, adding an extra layer of flavor and richness.
- Sweet and Spicy Pickles: Use bread-and-butter pickles instead of dill for a sweeter counterpart, perfect for those who prefer a milder flavor.
Dietary-Friendly Adjustments
- Vegan Version: Make a vegan batter using chickpea flour mixed with water as a base. This not only makes fried pickles plant-based but also adds delightful nuttiness.
- Keto Adaptation: Use crushed pork rinds in place of panko breadcrumbs to create a zero-carb option while maintaining a dear crunch.
FAQs
What If My Fried Dill Pickles Don’t Turn Out Right?
If your fried pickles are soggy, it could be due to excessive moisture or frying at too low of a temperature. Ensure to drain them thoroughly and heat the oil adequately before frying. If they are burnt, reduce the heat slightly and adjust cooking time accordingly.
Can I Prepare This in Advance?
While fried dill pickles are best enjoyed fresh, you can prepare the batter and coat the pickles in advance, storing them on a baking sheet covered with parchment paper in the refrigerator until you’re ready to fry them. Fry just before serving to ensure maximum crunch.
What Ingredients Can I Swap?
If you’re missing an ingredient, all-purpose flour can often be substituted with cornstarch or chickpea flour, while panko breadcrumbs can be replaced with crushed cornflakes. If garlic salt is unavailable, a mix of regular salt and garlic powder will work well in its place.
Print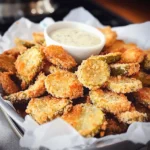
Fried Dill Pickles
Description
Fried Dill Pickles are a Southern-inspired appetizer that combines the tartness of dill pickles with a golden, crispy coating. Perfectly crunchy and full of flavor, these pickles are a crowd-pleasing snack served best with a dipping sauce.
Ingredients
- Vegetable oil (for frying)
- 1 (16-ounce) jar dill pickle slices
- 1/2 cup all-purpose flour
- 2 teaspoons garlic salt
- 1 teaspoon Italian seasoning
- 1/4 teaspoon pepper
- 3/4 cup water
- 1 1/2 cups panko breadcrumbs
Instructions
- Fill a frying pan with about 1/2 inch of vegetable oil and heat over medium-high until it reaches 350°F to 375°F.
- Drain dill pickle slices and pat them dry using paper towels.
- In a bowl, mix flour, garlic salt, Italian seasoning, and pepper. Gradually add water and whisk into a smooth batter.
- Place panko breadcrumbs in a separate shallow dish.
- Dip dried pickle slices into the batter, then coat with panko breadcrumbs.
- Carefully fry pickles in hot oil in small batches for 1–2 minutes per side, until golden brown.
- Remove fried pickles with a slotted spoon and place them on a paper towel-lined plate to drain excess oil.
- Serve immediately with your favorite dipping sauce such as ranch, marinara, or garlic aioli.
Notes
- For a gluten-free version, use almond flour and gluten-free breadcrumbs.
- Pat pickles thoroughly to help the batter stick better.
- Don’t overcrowd the pan to ensure even frying.
- Add spices like cayenne or paprika to the batter for extra flavor.
- Category: Appetizer, Snack
Nutrition
- Serving Size: 1/4 of recipe
- Calories: 220
- Sugar: 1g
- Sodium: 920mg
- Fat: 12g
- Saturated Fat: 2g
- Unsaturated Fat: 9g
- Trans Fat: 0g
- Carbohydrates: 23g
- Fiber: 2g
- Protein: 3g
- Cholesterol: 0mg