About Gluten Free Chocolate Protein Bars
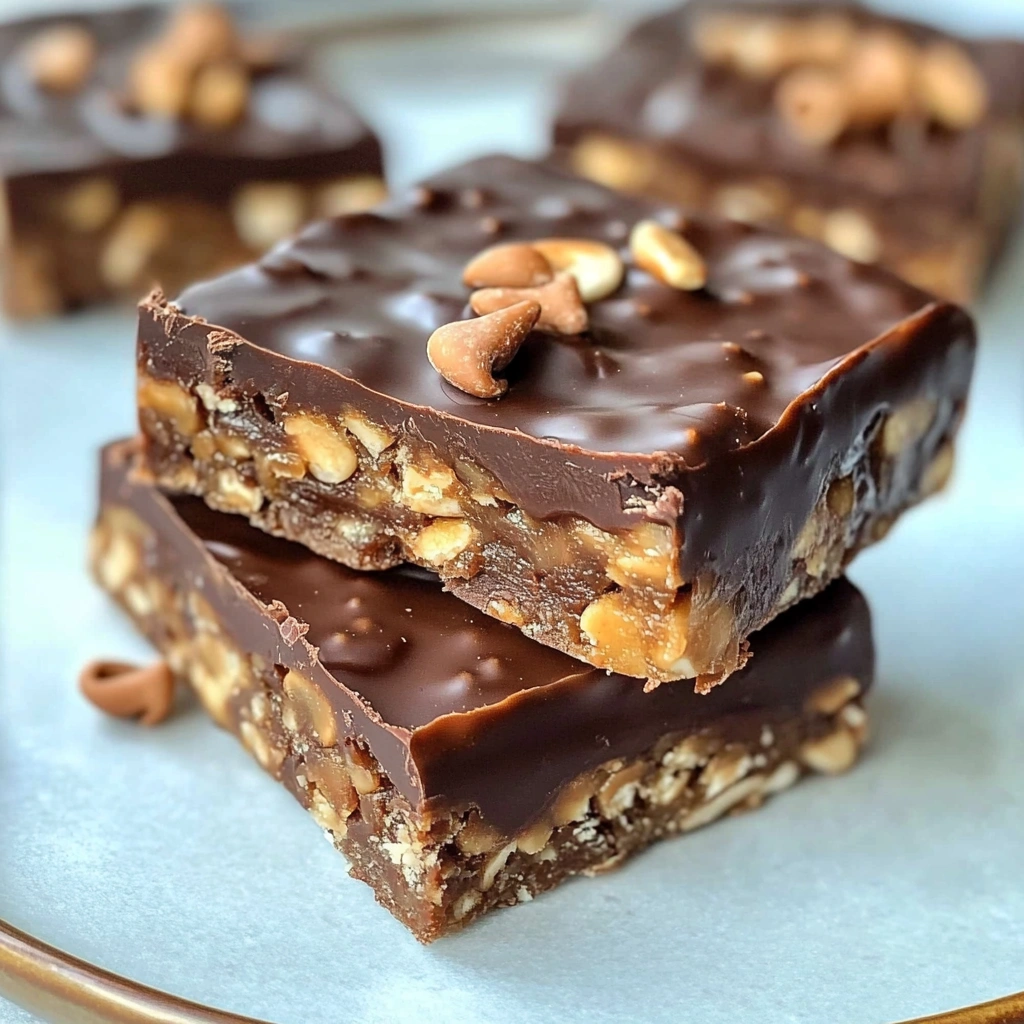
Gluten Free Chocolate Protein Bars are a decadent yet nutritious treat that combines the richness of chocolate with the healthy benefits of protein. Soft and chewy with a chocolatey exterior and a hint of sweetness, these bars make for a perfect snack or a post-workout boost. The fundamental textures range from being soft and moist in the inside to a slightly firmer outer layer, creating a satisfying contrast that delights the palate.

What You’ll Need for Gluten Free Chocolate Protein Bars
Complete Ingredients List
- 1 cup gluten-free rolled oats
- 1 cup chocolate protein powder
- 1/2 cup almond butter (or any nut butter)
- 1/4 cup honey or maple syrup
- 1/4 cup unsweetened cocoa powder
- 1/2 teaspoon vanilla extract
- 1/4 teaspoon salt
- 1/4 cup mini chocolate chips (dairy-free if needed)
Ingredient Substitutions & Alternatives
- Nut-Free Option: Substitute almond butter with sunflower seed butter or tahini.
- Sweetener Swap: Use agave syrup or coconut nectar instead of honey or maple syrup for a vegan alternative.
- Cacao vs. Cocoa: Feel free to replace unsweetened cocoa powder with cacao powder for a richer chocolate flavor.
- Flavor Variations: For an added twist, consider incorporating spices like cinnamon or nutmeg, or swap out the chocolate chips for dried fruits like cranberries or raisins.
How to Make Gluten Free Chocolate Protein Bars
Step 1: Preparing the Mixture
In a mixing bowl, combine the gluten-free rolled oats and chocolate protein powder. Stir them gently to ensure they are well blended. This combination creates the base for your protein bars, providing a solid foundation filled with nutrients.
Step 2: Blending in Wet Ingredients
Add in the almond butter, honey or maple syrup, unsweetened cocoa powder, vanilla extract, and salt. Using a spatula or your hands, mix all the ingredients until you achieve a sticky, combined dough. The almond butter acts as a binding agent, holding the dry ingredients together while infusing the bar with moisture and flavor.
Step 3: Incorporating Chocolate Chips
Once your mixture is well-combined, fold in the mini chocolate chips. This step adds delightful bursts of chocolate throughout the bars, enhancing both flavor and texture. Ensure that the chocolate chips are evenly distributed.
Step 4: Pressing into a Pan
Line an 8×8 inch baking pan with parchment paper. Press the mixture firmly into the pan with your hands or a flat spatula, creating an even layer that fills the corners. Make sure to pack it tightly, as this will help the bars hold their shape after baking.
Step 5: Chilling the Bars
Refrigerate for at least 1-2 hours or until firm. This chilling period allows the bars to set properly. After they have set, remove them from the pan and cut them into squares or rectangles using a sharp knife.
Step 6: Storing the Bars
Once cut, these gluten-free chocolate protein bars can be stored in an airtight container in the fridge for up to two weeks. They can also be individually wrapped and frozen for longer storage.
Serving Suggestions for Gluten Free Chocolate Protein Bars
How to Serve Gluten Free Chocolate Protein Bars
These bars can be served chilled or at room temperature, depending on your preference. For a more decadent treat, consider warming them slightly in the microwave—this brings out the chocolate flavor and creates a gooey consistency that feels indulgent.
To plate, arrange the bars on a colorful serving platter or on a rustic wooden board. You can sprinkle cocoa powder or chopped nuts on top for an added decorative touch.
Perfect Pairings & Toppings
For an extra special treat, drizzle melted dark chocolate on top or sprinkle sea salt for a sweet-salty contrast. Pair these protein bars with fresh fruit, like apple slices or banana halves, for a more balanced snack. They also go well with a glass of almond milk or a smoothie for a complete post-workout meal.
Storing & Preserving Gluten Free Chocolate Protein Bars
Best Storage Methods
To store your gluten-free chocolate protein bars, place them in an airtight container. If you prefer, you can keep them in the fridge, where they will last up to two weeks. For longer preservation, these bars can also be frozen; simply ensure they are tightly wrapped and stored in a freezer-safe bag, where they will keep for up to three months.
Reheating or Freezing Tips
When you’re ready to enjoy a frozen bar, simply remove it from the freezer and let it sit at room temperature for about 15-20 minutes. For a quick microwave option, place it on a microwave-safe plate and heat for 10-15 seconds. This process will keep the texture soft, ensuring you enjoy the bars just as they were intended.
Tips for Perfect Gluten Free Chocolate Protein Bars Every Time
Avoid These Common Mistakes
- Not Packing Enough: If the mixture isn’t tightly packed in the pan, the bars may crumble easily after being cut.
- Using Wrong Ratios: Keeping ingredients in the correct proportions is essential for the bars to set properly.
- Insufficient Chilling Time: Don’t rush the chilling process! Allow the bars to firm up to maintain their shape.
Helpful Tricks for Success
- Pre-measure Ingredients: Before starting, have all your ingredients pre-measured to streamline the process. This also prevents any discrepancies in quantity.
- Use a Food Processor: For easier mixing, especially with sticky nut butters, consider using a food processor. This tool can help achieve a smooth and well-combined mixture quickly.
- Experiment with Sweeteners: Different sweeteners can give subtly different flavors; if you’re adventurous, try a variety to find your favorite.
Fun Variations of Gluten Free Chocolate Protein Bars
Flavor Variations or Recipe Twists
To keep things interesting, consider adding different flavor profiles:
- Nutty Chocolate: Mix in crushed nuts such as walnuts or pecans for an added crunch.
- Fruit Infusion: Dried fruits like raisins or apricots can also elevate the taste and texture.
- Spiced Chocolate: Add a pinch of cayenne pepper or espresso powder for a delightful twist that enhances the chocolate flavor.
Dietary-Friendly Adjustments
- Vegan: Use plant-based protein powder and replace honey with maple syrup.
- Keto-Friendly: Substitute the oats with ground almonds and use a sugar-free sweetener.
- Sugar-Free: Opt for stevia or monk fruit sweeteners to satisfy cravings without the sugar.
FAQs
What If My Gluten Free Chocolate Protein Bars Doesn’t Turn Out Right?
If your bars are too dry, it may be because of excess dry ingredients. You can remedy this by adding a little more nut butter or sweetener to the mixture before packing it into the pan. If they don’t set, try refrigerating them for a longer period or add a bit more protein powder to achieve the desired consistency.
Can I Prepare This in Advance?
Absolutely! These bars can be made ahead of time and stored in the fridge or freezer until ready to serve. They make for a convenient snack option, and you can even prepare multiple batches to have on hand for busy weeks.
What Ingredients Can I Swap?
Feel free to swap the protein powder for a different flavor like vanilla or even a plant-based protein powder, depending on your dietary needs. You can also replace almond butter with another nut or seed butter according to your preference or dietary restrictions.
Print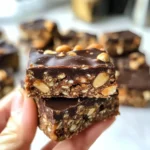
Gluten Free Chocolate Protein Bars
- Total Time: 1 hour 15 minutes (including chill time)
- Yield: 9–12 bars 1x
- Diet: Gluten Free
Description
Gluten Free Chocolate Protein Bars are a nutritious and delicious snack combining the richness of chocolate with the health benefits of protein. These bars are soft, chewy, and perfect for on-the-go energy or post-workout recovery.
Ingredients
- 1 cup gluten-free rolled oats
- 1 cup chocolate protein powder
- 1/2 cup almond butter (or any nut butter)
- 1/4 cup honey or maple syrup
- 1/4 cup unsweetened cocoa powder
- 1/2 teaspoon vanilla extract
- 1/4 teaspoon salt
- 1/4 cup mini chocolate chips (dairy-free if needed)
Instructions
- In a mixing bowl, combine the gluten-free rolled oats and chocolate protein powder. Stir until well blended.
- Add almond butter, honey or maple syrup, cocoa powder, vanilla extract, and salt. Mix until a sticky dough forms.
- Fold in the mini chocolate chips until evenly distributed.
- Line an 8×8 inch baking pan with parchment paper and press the mixture firmly into the pan to create an even layer.
- Refrigerate for 1-2 hours, or until firm.
- Once set, remove from the pan and cut into bars or squares.
- Store in an airtight container in the fridge for up to 2 weeks or freeze for longer storage.
Notes
- For a nut-free version, use sunflower seed butter or tahini instead of almond butter.
- Use agave syrup or coconut nectar for a vegan option.
- Replace cocoa powder with cacao powder for a richer flavor.
- Customize with add-ins like cinnamon, nutmeg, or dried fruit.
- Prep Time: 15 minutes
- Cook Time: 0 minutes
- Category: Snack
- Method: No-Bake
- Cuisine: American
Nutrition
- Serving Size: 1 bar
- Calories: 180
- Sugar: 8g
- Sodium: 100mg
- Fat: 10g
- Saturated Fat: 2g
- Unsaturated Fat: 7g
- Trans Fat: 0g
- Carbohydrates: 15g
- Fiber: 3g
- Protein: 9g
- Cholesterol: 0mg
Keywords: gluten free protein bars, chocolate protein snack, healthy no-bake bars, post workout snack, easy protein bar recipe