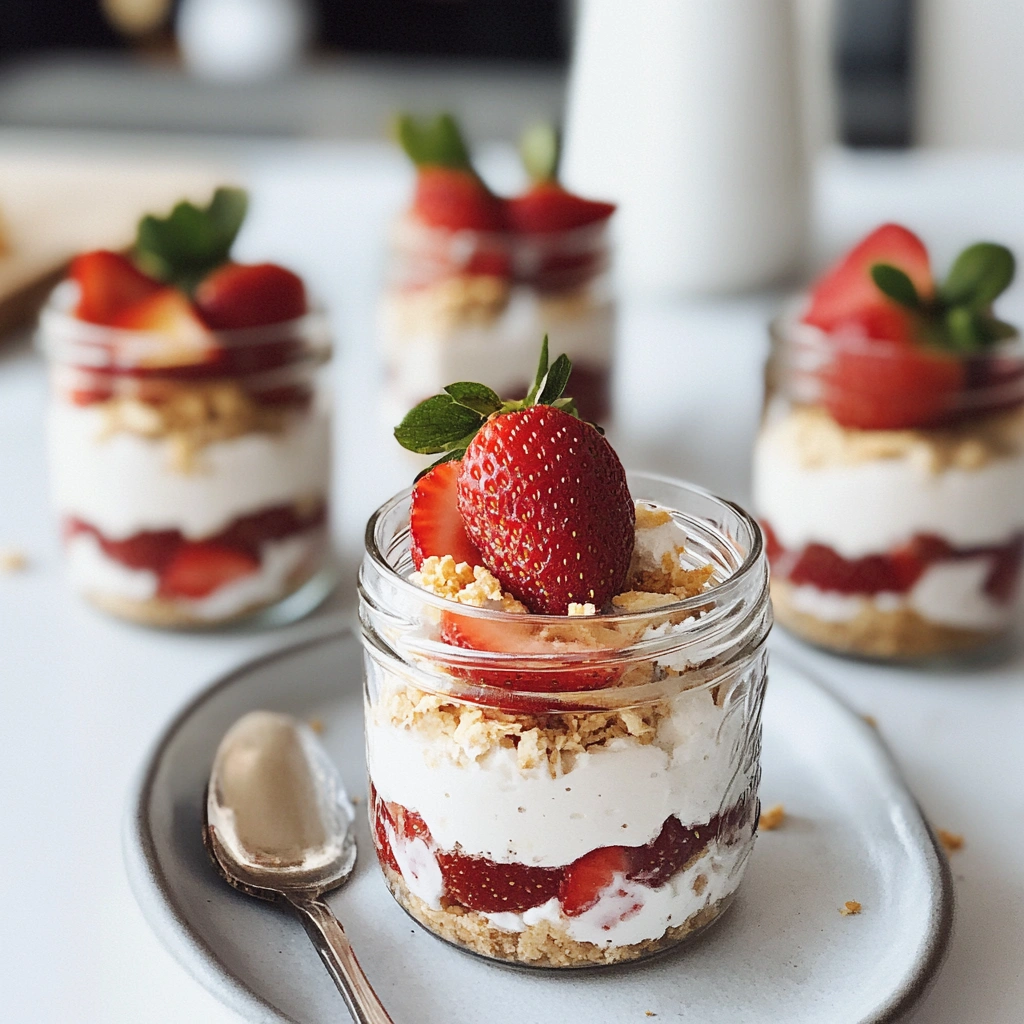
No-Bake Strawberry Cheesecake Jars are a delightful dessert that embodies the essence of summer with their vibrant flavor and creamy texture. This dessert is a harmonious blend of tangy cream cheese, refreshing Greek yogurt, and luscious strawberries, all layered within a crumbly vanilla wafer crust. With no baking required, it’s perfect for those warm months when the last thing you want to do is turn on the oven.

What You’ll Need for No-Bake Strawberry Cheesecake Jars
To make the No-Bake Strawberry Cheesecake Jars, gather the following ingredients required for this easy yet satisfying recipe.
Complete Ingredients List
- 8 ounces high-quality vanilla wafers
- 3 tablespoons unsalted butter, melted
- 8 ounces reduced-fat cream cheese, softened
- 1/2 cup plain Greek yogurt
- 1/4 cup granulated sugar
- 1/2 teaspoon vanilla extract
- Zest of 1 lemon
- 1 teaspoon lemon juice
- 1 1/2 cups high-quality whipped topping
- 4 cups hulled and quartered strawberries, divided
Ingredient Substitutions & Alternatives
While this recipe is delicious as is, there are several ways to tweak it to accommodate different dietary needs. For a dairy-free version, swap out the cream cheese and Greek yogurt for vegan alternatives made from cashews or tofu. Instead of whipped topping, consider using coconut whipped cream. For those with gluten sensitivities, gluten-free vanilla wafers can easily replace traditional ones. If you’re looking to add a fun twist to the flavor, think about incorporating crushed pineapple or a different berry like blueberries or raspberries into the layers.
How to Make No-Bake Strawberry Cheesecake Jars
Making No-Bake Strawberry Cheesecake Jars is an efficient process that will have you enjoying this dessert in no time. With its simple steps, you’ll find it both approachable and rewarding.
Step 1: Prepare the Cookie Crust
Begin by placing the vanilla wafers into a food processor. Pulse until the cookies become fine crumbs; this should take about 30 seconds. Once processed, pour the melted butter into the crumbs and process for an additional 3-5 seconds. The mixture should begin to stick together and resemble wet sand. Measure out about 2 tablespoons of the crumb mixture and evenly distribute it into the bottom of each mason jar. Use your fingers or the back of a spoon to gently press down the crumbs, forming a solid base. Place the jars in the refrigerator while you prepare the cheesecake filling.
Step 2: Create the Cheesecake Filling
In a large mixing bowl, combine the softened cream cheese, Greek yogurt, and granulated sugar. Using a hand mixer on high speed, blend these ingredients until smooth and creamy—this should take about 1-2 minutes. To this mixture, add the vanilla extract, lemon zest, and lemon juice. Beat for an additional 30 seconds until everything is well blended. Gently fold in the whipped topping and 1 cup of the quartered strawberries, creating a light and airy cheesecake mixture.
Step 3: Layer the Jars
Remove the jars from the refrigerator and begin layering the cheesecake filling. Spoon about 2-3 tablespoons of the cream cheese mixture into each jar, spreading it evenly. Next, layer with 2-3 tablespoons of the remaining strawberries. Repeat the process by adding the rest of the cheesecake filling, followed by the remaining strawberries on top. Ensure that the jars are filled but not overflowing to maintain a neat appearance.
Step 4: Chill and Serve
Once the jars are all layered, cover them with lids and place them back into the refrigerator. Allow the jars to chill for at least 1-2 hours, or ideally overnight. This chilling period helps all the flavors meld together beautifully and allows the cheesecake to firm up slightly. When ready to serve, simply uncover the jars and enjoy cold to experience the delightful contrast of textures and flavors.
Serving Suggestions for No-Bake Strawberry Cheesecake Jars
How to Serve No-Bake Strawberry Cheesecake Jars
No-Bake Strawberry Cheesecake Jars are best served cold, as the chill enhances the refreshing nature of the strawberries and cheese. Present them straight from the refrigerator for maximum enjoyment, and consider removing the lids just before serving to enhance the visual appeal of the layers.
Perfect Pairings & Toppings
To elevate your dessert experience, consider topping each jar with additional sliced strawberries, a drizzle of strawberry sauce, or a sprinkle of crushed wafers for added crunch. Fresh mint leaves can add a pop of color and a hint of freshness as a garnish. Pairing these jars with a dollop of whipped cream or a scoop of vanilla ice cream can create a delightful contrast of flavors and textures, turning an already special dessert into a showstopper.
Storing & Preserving No-Bake Strawberry Cheesecake Jars
Best Storage Methods
To store the No-Bake Strawberry Cheesecake Jars, ensure they remain covered and refrigerated. They will keep well in the fridge for up to 3-4 days, maintaining their flavor and texture. Avoid freezing these jars, as the cream cheese and whipped topping may separate upon thawing, affecting the dessert’s creamy consistency.
Reheating or Freezing Tips
Since this is a no-bake dessert that is inherently served cold, there is no need to reheat or freeze. If you accidentally freeze any jars, allow them to sit in the refrigerator for a few hours to thaw slowly. This will help preserve the best texture possible, although it may not be as smooth as when freshly prepared.
Tips for Perfect No-Bake Strawberry Cheesecake Jars Every Time
Avoid These Common Mistakes
One common mistake to avoid is overwhipping the cream cheese and Greek yogurt mixture, which can lead to a grainy texture. Always make sure that the cream cheese is adequately softened before mixing—this will ensure a smooth blend, resulting in a creamy filling. Additionally, be mindful not to overfill the jars with filling, as this can lead to messy spills when serving.
Helpful Tricks for Success
For time-saving hacks, consider prepping the crust and filling a day in advance. Simply store them separately and assemble the jars on the day of serving. To enhance the flavor even further, let the jars sit in the fridge overnight before serving; this extra chill time helps blend the flavors dynamically. Lastly, using quality ingredients, such as high-quality vanilla wafers and fresh strawberries, can greatly improve the taste of your final product.
Fun Variations of No-Bake Strawberry Cheesecake Jars
Flavor Variations or Recipe Twists
Feel free to experiment with different flavors by incorporating unique ingredients. For example, consider adding crushed graham crackers in place of vanilla wafers for a classic cheesecake flavor. You could also incorporate a hint of cocoa powder if you’re in the mood for chocolate-strawberry cheesecake jars. For a tropical twist, substitute strawberries with mango or passion fruit, providing a refreshing change of pace.
Dietary-Friendly Adjustments
Those following specific dietary needs can truly enjoy these jars too! For an entirely vegan version, use plant-based cream cheese and coconut yogurt instead of traditional dairy products. To make them sugar-free, swap out granulated sugar with a sugar substitute or natural sweeteners like maple syrup or agave nectar. If you’re aiming for a keto-friendly dessert, consider using almond flour mixed with melted butter for the crust and a low-carb sweetener in place of sugar.
FAQs
What If My No-Bake Strawberry Cheesecake Jars Doesn’t Turn Out Right?
If your cheesecake filling turns out too dry or isn’t setting, it might be due to overmixing or not using enough moisture-rich ingredients. Ensure your cream cheese is thoroughly softened before mixing, and consider adding a bit more yogurt or whipped topping to adjust the consistency. If it’s too runny, it may benefit from extra chilling time in the refrigerator.
Can I Prepare This in Advance?
Absolutely! No-Bake Strawberry Cheesecake Jars are a fantastic make-ahead dessert. You can prepare the jars a day or two in advance, allowing the flavors to meld beautifully as they chill. Just ensure they are well-covered to avoid absorbing any odors from other foods in the fridge.
What Ingredients Can I Swap?
Common swaps include using low-fat or non-dairy cream cheese for those looking to reduce fat or adhere to a plant-based diet. If you can’t find plain Greek yogurt, any type of Greek-style yogurt will do, whether it’s full-fat or flavored. For gluten-free options, use gluten-free vanilla wafers or substitute with crushed nuts or gluten-free granola to create a crust.
In conclusion, No-Bake Strawberry Cheesecake Jars offer a delightful way to enjoy a classic dessert while embracing a lightness that is perfect for warm weather. With its easy assembly and freshness of flavors, it’s sure to be a family favorite whether served at gatherings or as a simple treat at home. Embrace your creativity with this recipe, and let the sweet enjoyment of strawberry cheesecake transform your dessert repertoire!
Print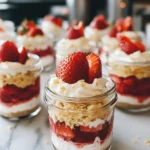
No-Bake Strawberry Cheesecake Jars
- Total Time: 2 hours 20 minutes (including chilling)
- Yield: 6 jars 1x
- Diet: Vegetarian
Description
No-Bake Strawberry Cheesecake Jars are a refreshing summer dessert layered with creamy cheesecake filling, fresh strawberries, and a vanilla wafer crust—perfect for warm weather with no oven required.
Ingredients
- 8 ounces high-quality vanilla wafers
- 3 tablespoons unsalted butter, melted
- 8 ounces reduced-fat cream cheese, softened
- 1/2 cup plain Greek yogurt
- 1/4 cup granulated sugar
- 1/2 teaspoon vanilla extract
- Zest of 1 lemon
- 1 teaspoon lemon juice
- 1 1/2 cups high-quality whipped topping
- 4 cups hulled and quartered strawberries, divided
Instructions
- Place vanilla wafers in a food processor and pulse until fine crumbs form, about 30 seconds. Add melted butter and pulse for 3–5 more seconds until combined.
- Distribute about 2 tablespoons of the crumb mixture into the bottom of each mason jar and press down gently to form a crust. Refrigerate while preparing the filling.
- In a large bowl, mix softened cream cheese, Greek yogurt, and sugar using a hand mixer on high for 1–2 minutes until smooth and creamy.
- Add vanilla extract, lemon zest, and lemon juice to the mixture and beat for another 30 seconds.
- Gently fold in whipped topping and 1 cup of the strawberries until well incorporated.
- Layer each jar with 2–3 tablespoons of cheesecake filling, followed by 2–3 tablespoons of strawberries. Repeat the layers and finish with strawberries on top.
- Cover jars with lids and chill in the refrigerator for at least 1–2 hours or overnight before serving.
Notes
- Use gluten-free vanilla wafers for a gluten-free version.
- Swap dairy with plant-based alternatives for a vegan option.
- Chill overnight for best flavor and texture.
- Try different fruits like blueberries or raspberries for variation.
- Prep Time: 20 minutes
- Cook Time: 0 minutes
- Category: Dessert
- Method: No-Bake
- Cuisine: American
Nutrition
- Serving Size: 1 jar
- Calories: 310
- Sugar: 18g
- Sodium: 140mg
- Fat: 18g
- Saturated Fat: 10g
- Unsaturated Fat: 7g
- Trans Fat: 0g
- Carbohydrates: 32g
- Fiber: 2g
- Protein: 5g
- Cholesterol: 35mg
Keywords: no-bake cheesecake, strawberry jars, summer dessert, mason jar dessert, quick dessert