


There’s something incredibly comforting about a warm, buttery breadstick, especially when it echoes the flavors of your favorite restaurant. I remember my first visit to Olive Garden, where the moment I stepped in, the enticing aroma of baked breadsticks filled the air. Those soft, pillowy sticks, brushed with garlic butter and sprinkled with Italian seasoning, instantly became a highlight of my dining experience. The good news? You can recreate that magic in your own kitchen with Homemade Olive Garden Breadsticks. This recipe is not only simple but also incredibly satisfying—there’s nothing quite like the joy of pulling a tray of freshly baked breadsticks from the oven, filling your home with that irresistible smell. Imagine serving them warm to friends and family, just like at Olive Garden, to create unforgettable moments at your dining table. Get ready to embark on a culinary adventure that brings a taste of Italy right into your home!

Ingredients List
To make your own delicious Homemade Olive Garden Breadsticks, you’ll need the following ingredients:
- 2 cups warm water (110°F)
- 1 packet active dry yeast (2 1/4 teaspoons)
- 1 tablespoon sugar
- 4 cups all-purpose flour
- 2 teaspoons salt
- 1/4 cup unsalted butter, melted
- 1 tablespoon garlic powder
- 1 tablespoon Italian seasoning
- 1/4 cup grated Parmesan cheese
Ensure that the water is warm, as this is crucial for activating the yeast. The sugar helps to feed the yeast, promoting a good rise. All-purpose flour is recommended for the best texture, but feel free to experiment with other types if you prefer. Use unsalted butter for a richer flavor, and don’t forget the garlic powder and Italian seasoning, which are essential for that classic Olive Garden taste.
How to Prepare Instructions
Making your own Homemade Olive Garden Breadsticks is a straightforward process that yields delicious results. Follow these steps to ensure your breadsticks turn out perfectly every time.
Step 1: Prepare the Yeast Mixture
Start by combining 2 cups of warm water (about 110°F) with 1 packet of active dry yeast (2 1/4 teaspoons) and 1 tablespoon of sugar in a large mixing bowl. Stir gently to dissolve the yeast and sugar. Let the mixture sit for about 5 minutes until it becomes foamy. This step is crucial as it activates the yeast, ensuring your breadsticks rise properly.
Step 2: Make the Dough
Once your yeast mixture is foamy, add 4 cups of all-purpose flour and 2 teaspoons of salt to the bowl. Pour in 1/4 cup of melted unsalted butter. Using a wooden spoon or your hands, mix the ingredients until a rough dough forms. The dough should be slightly sticky but manageable. If it’s too sticky, you can add a little more flour as needed.
Step 3: Knead the Dough
Transfer the dough onto a floured surface, and begin kneading. Fold the dough over itself and push it down with the heel of your hand, then rotate it a quarter turn and repeat. Knead for about 5 minutes until the dough is smooth and elastic. The dough should spring back when poked gently, indicating that it has developed enough gluten for a good rise.
Step 4: First Rise
Place the kneaded dough into a greased bowl and cover it with a clean kitchen towel or plastic wrap. Let it rise in a warm, draft-free area for about 1 hour, or until it has doubled in size. This is the first rise, which is essential for achieving the fluffy texture of your breadsticks.
Step 5: Shape the Breadsticks
After the first rise, gently punch down the dough to release the air. Divide the dough into 12 equal pieces. Take each piece and roll it into a long stick, approximately 6-8 inches in length. Place the rolled sticks onto a greased baking sheet, leaving some space between each stick to allow for expansion during the second rise.
Step 6: Second Rise
Cover the shaped breadsticks with a kitchen towel and let them rise again for about 30 minutes. This second rise is important for achieving the light and airy texture characteristic of Homemade Olive Garden Breadsticks.
Step 7: Baking
Preheat your oven to 400°F (200°C). Once the second rise is complete, place the baking sheet in the oven and bake the breadsticks for 12-15 minutes, or until they are golden brown. Keep an eye on them; the tops should be lightly browned while the insides remain soft.
Step 8: Finishing Touches
While the breadsticks are baking, prepare the finishing touch by mixing together 1/4 cup of melted butter, 1 tablespoon of garlic powder, and 1 tablespoon of Italian seasoning in a small bowl. Once the breadsticks are done baking, remove them from the oven and immediately brush the buttery mixture over the tops. This adds that signature flavor reminiscent of Olive Garden’s famous breadsticks.
Why You’ll Love This Recipe
- Quick Preparation: The entire process takes less than two hours, making it easy to whip up a batch even on a busy day.
- Easy Ingredients: You likely already have most of the ingredients at home, making this a convenient option for any day.
- Customizable Flavors: Experiment with different herbs, cheeses, or toppings to create your perfect breadstick.
- Perfect for Any Meal: These breadsticks complement a variety of dishes, from pasta to salads, or can be enjoyed on their own.
- Impressive Homemade Touch: Serving warm, freshly baked breadsticks is sure to impress your family and guests.
🍴 Top Kitchen Essentials You’ll Love




Tips for Success
To ensure your Homemade Olive Garden Breadsticks turn out perfectly every time, consider these pro tips:
Kneading Techniques
When kneading the dough, make sure to use a good amount of flour on your work surface to prevent sticking. Knead until the dough is smooth and elastic, which usually takes about 5 minutes. If you find the dough is too sticky, gradually add small amounts of flour to help achieve the right consistency. A well-kneaded dough will spring back when poked, indicating that it’s ready for rising.
Rising Environment Tips
The rising process is crucial for achieving fluffy breadsticks. To create an ideal environment for the dough to rise, place it in a warm, draft-free location. You can turn on your oven to the lowest setting for a few minutes, then turn it off and place the dough inside, covered with a towel. This gentle warmth encourages yeast activity and helps the dough to rise effectively.
Baking Adjustments
Every oven is different, so keep an eye on your breadsticks as they bake. If you notice that the tops are browning too quickly, you can loosely cover them with aluminum foil to prevent over-browning while allowing the insides to bake thoroughly. Also, make sure to bake them until they are golden brown, as this ensures a delicious crust while keeping the interior soft and fluffy.
Nutritional Information Disclaimer
It’s important to note that nutritional information can vary based on the specific ingredients and brands you use in your Homemade Olive Garden Breadsticks. The following values are based on a standard recipe and are meant to serve as a general guideline:
- Serving Size: 1 breadstick
- Calories: 150
- Sugar: 1g
- Sodium: 200mg
- Fat: 6g
- Saturated Fat: 3g
- Unsaturated Fat: 2g
- Trans Fat: 0g
- Carbohydrates: 20g
- Fiber: 1g
- Protein: 4g
- Cholesterol: 15mg
For the most accurate nutritional information, please calculate values based on the specific ingredients you choose to use.
FAQ Section
What If My Homemade Olive Garden Breadsticks Don’t Turn Out Right?
If your breadsticks don’t rise properly or turn out dense, it could be due to expired yeast or not allowing enough time for the dough to rise. Make sure to check the expiration date on your yeast and ensure the water is at the right temperature for activation. If they turn out too hard, they may have been overbaked; keep an eye on them in the oven and remove them when they’re golden brown.
Can I Prepare This in Advance?
Yes, you can prepare the dough in advance! After kneading, cover it tightly and refrigerate it for up to 24 hours. When you’re ready to bake, let the dough come to room temperature, then proceed with the shaping and rising steps as directed in the recipe. You can also freeze the shaped breadsticks before the second rise. Just let them thaw and rise before baking.
What Ingredients Can I Swap?
For a gluten-free version of Homemade Olive Garden Breadsticks, you can use a gluten-free all-purpose flour blend. If you’re looking to reduce fat, you can substitute the butter with olive oil or a vegan butter alternative. For a dairy-free option, simply omit the Parmesan cheese or use a dairy-free cheese substitute. Additionally, you can customize the seasonings according to your taste, adding herbs or spices you enjoy!
Print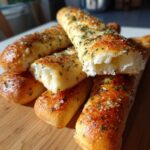
Homemade Olive Garden Breadsticks
- Total Time: 1 hour 45 minutes
- Yield: 12 breadsticks 1x
- Diet: Vegetarian
Description
This recipe allows you to create your own version of Olive Garden’s famous breadsticks at home.
Ingredients
- 2 cups warm water (110°F)
- 1 packet active dry yeast (2 1/4 teaspoons)
- 1 tablespoon sugar
- 4 cups all-purpose flour
- 2 teaspoons salt
- 1/4 cup unsalted butter, melted
- 1 tablespoon garlic powder
- 1 tablespoon Italian seasoning
- 1/4 cup grated Parmesan cheese
Instructions
- In a large bowl, combine warm water, yeast, and sugar. Let sit until foamy, about 5 minutes.
- Add flour, salt, and melted butter to the yeast mixture. Mix until a dough forms.
- Knead the dough on a floured surface for 5 minutes until smooth.
- Place the dough in a greased bowl, cover, and let rise for 1 hour or until doubled in size.
- Punch down the dough and divide it into 12 equal pieces.
- Roll each piece into a long stick and place on a greased baking sheet.
- Cover and let rise for another 30 minutes.
- Preheat the oven to 400°F (200°C).
- Bake for 12-15 minutes or until golden brown.
- In a small bowl, mix melted butter, garlic powder, and Italian seasoning. Brush over the warm breadsticks.
🍴 Top Kitchen Essentials You’ll Love
Notes
- Serve warm with marinara sauce or olive oil for dipping.
- Store leftovers in an airtight container for up to 2 days.
- Reheat in the oven for best texture.
- Prep Time: 15 minutes
- Cook Time: 15 minutes
- Category: Bread
- Method: Baking
- Cuisine: Italian
Nutrition
- Serving Size: 1 breadstick
- Calories: 150
- Sugar: 1g
- Sodium: 200mg
- Fat: 6g
- Saturated Fat: 3g
- Unsaturated Fat: 2g
- Trans Fat: 0g
- Carbohydrates: 20g
- Fiber: 1g
- Protein: 4g
- Cholesterol: 15mg
Keywords: Homemade Olive Garden Breadsticks, Breadsticks recipe, Olive Garden recipe